Prerequisites
- Supabase project
- PNTA account with project ID (
prj_XXXXXXXXX) - Platform keys configured in PNTA Dashboard (see Platform Keys Setup)
- Devices registered via a PNTA client SDK, with relevant identifiers stored in device metadata (e.g.
user_id)
Setup Steps
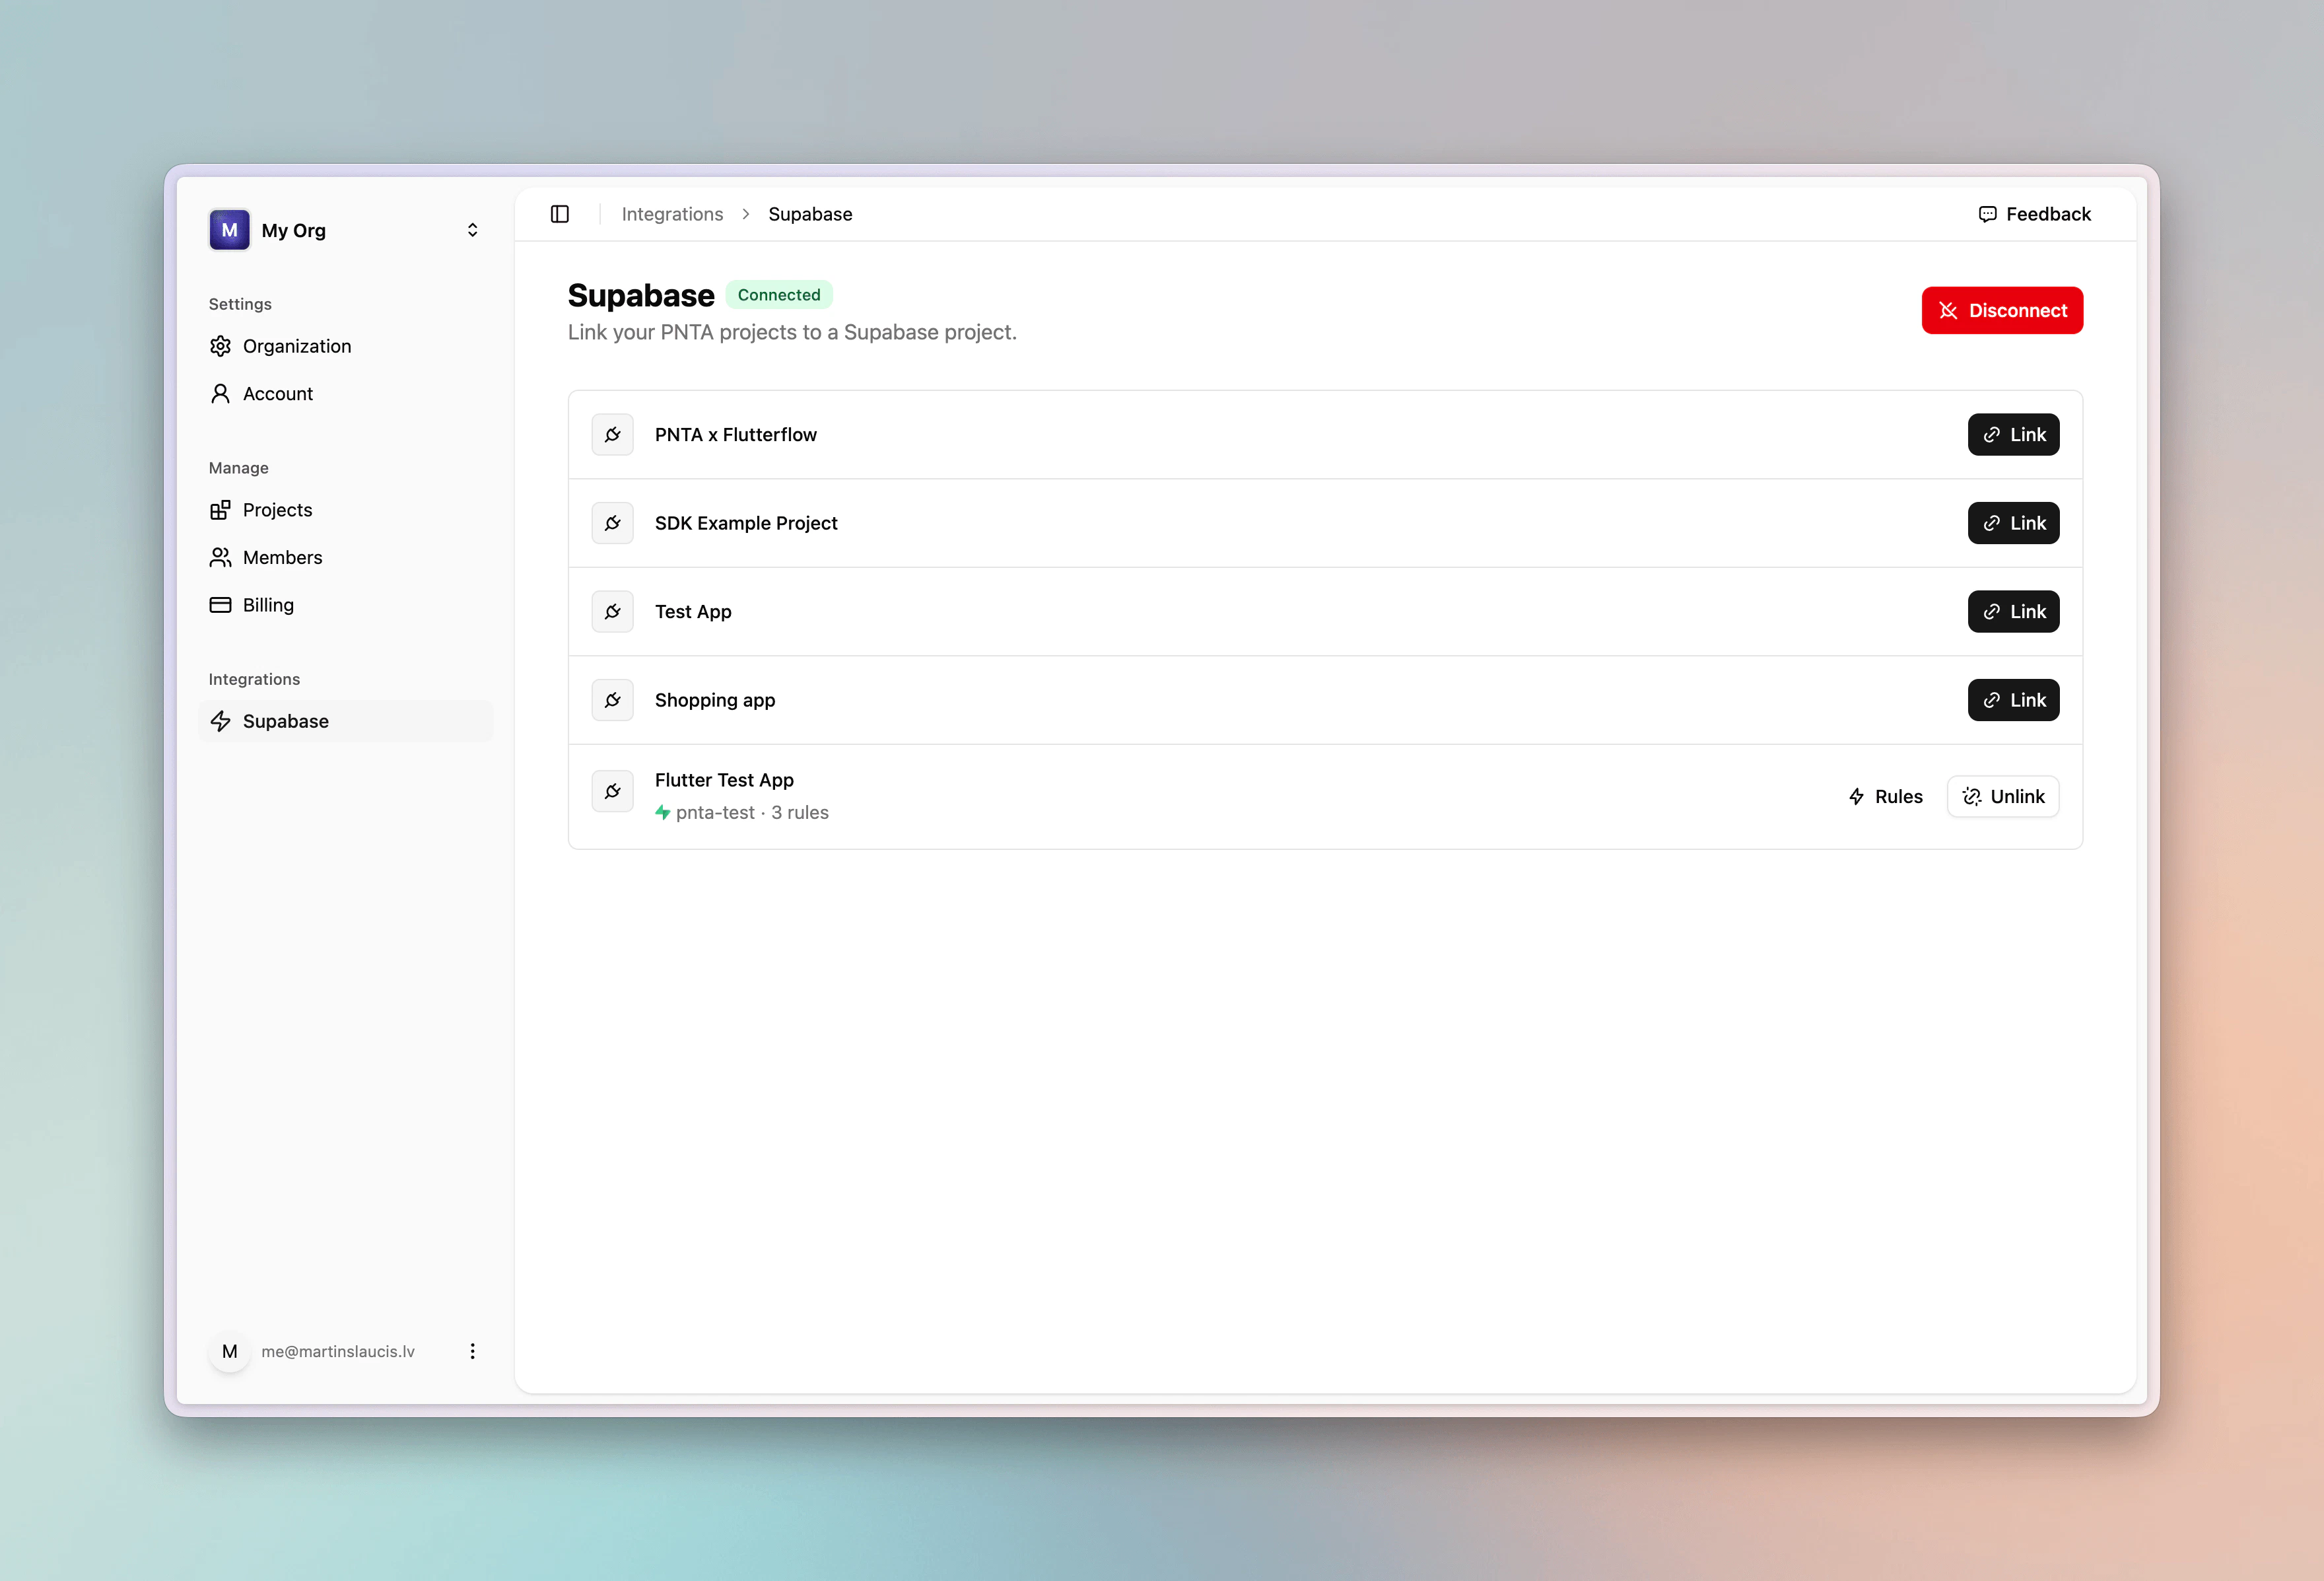
1. Connect Your Supabase Project
- In the PNTA Dashboard sidebar, open the Integrations section and click Supabase
- Click Connect
- Authorize PNTA via OAuth
- Link a Supabase project to your PNTA project
- Go to Rules
PNTA uses OAuth to connect to your Supabase project. No manual database
configuration or SQL is required. Everything is set up automatically.
2. Create a Notification Rule
From Rules, click New Rule.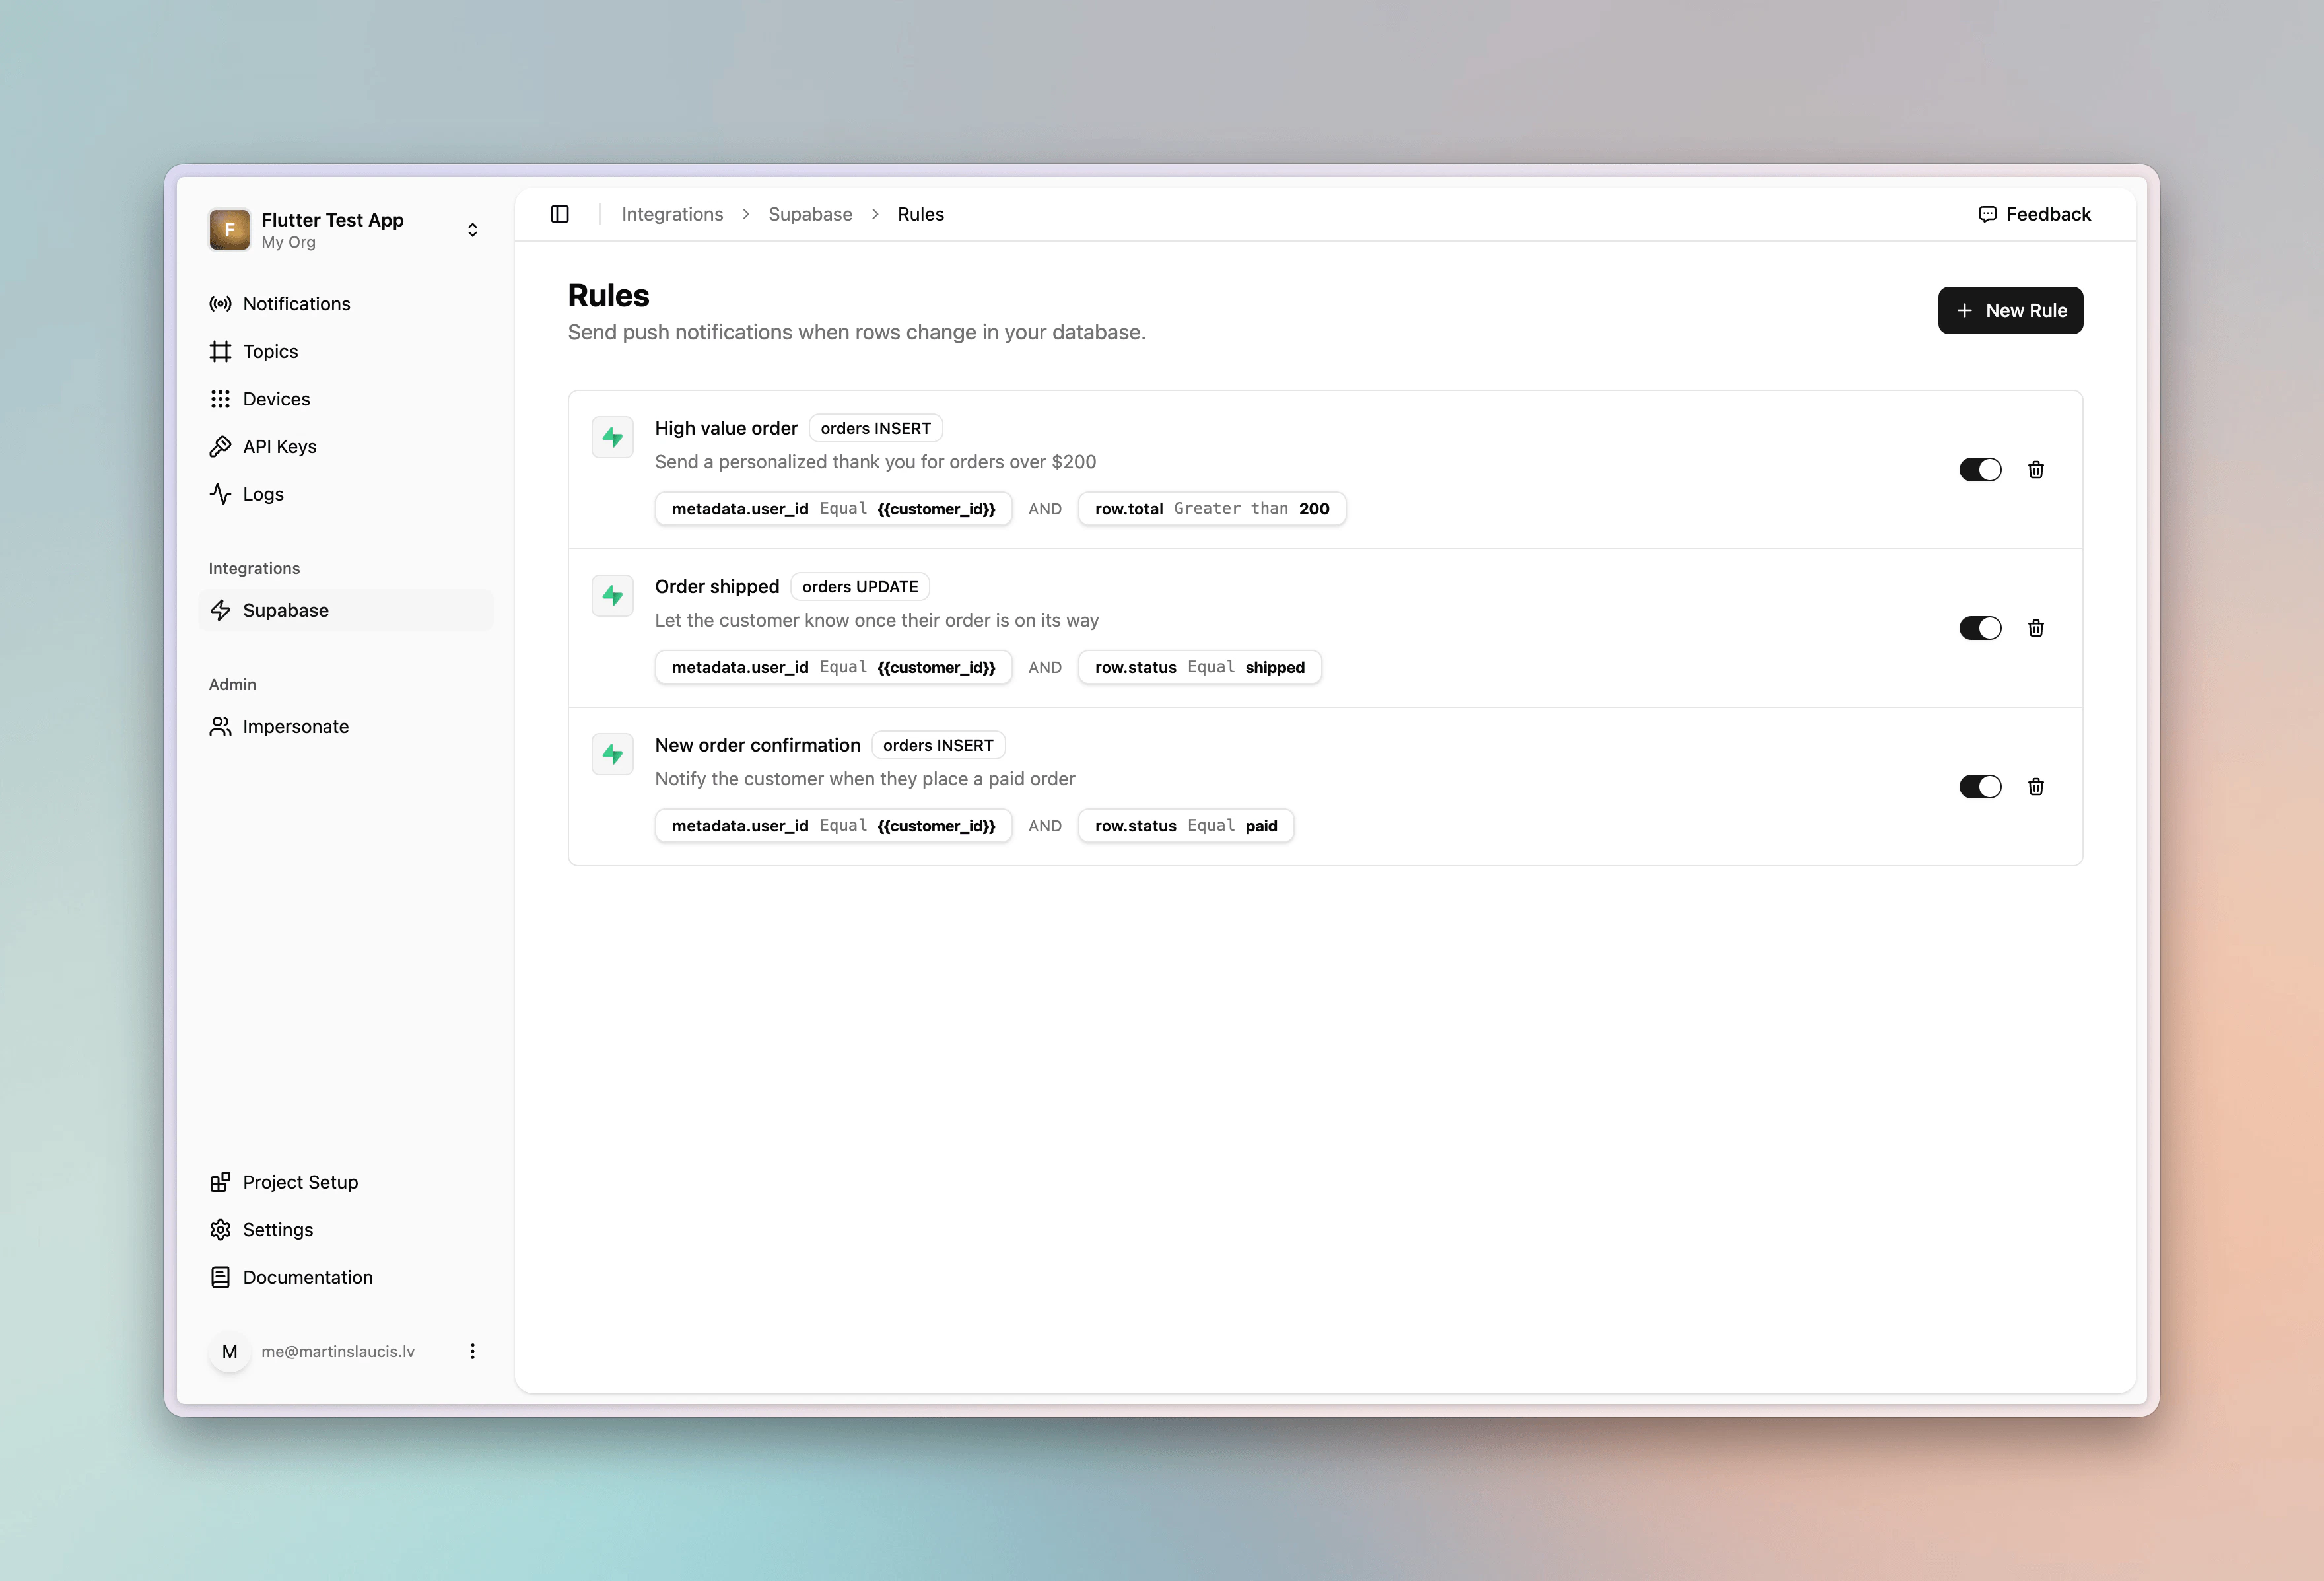
orders table as the example:
- Description:
Notify the customer when they place a paid order
- Table:
orders - Event:
insert
3. Add Conditions
Conditions decide who receives the push and when it fires. Each rule typically combines:- A device filter (
metadata.*oridentifiers.*) that routes to the right devices - A row filter (
row.*) that gates the rule on row values
user_id set to the customer’s ID).
For the order confirmation rule:
metadata.user_idis_equal{{customer_id}}targets only the customer’s devicesrow.statusis_equalpaidensures the rule only fires once the order is paid
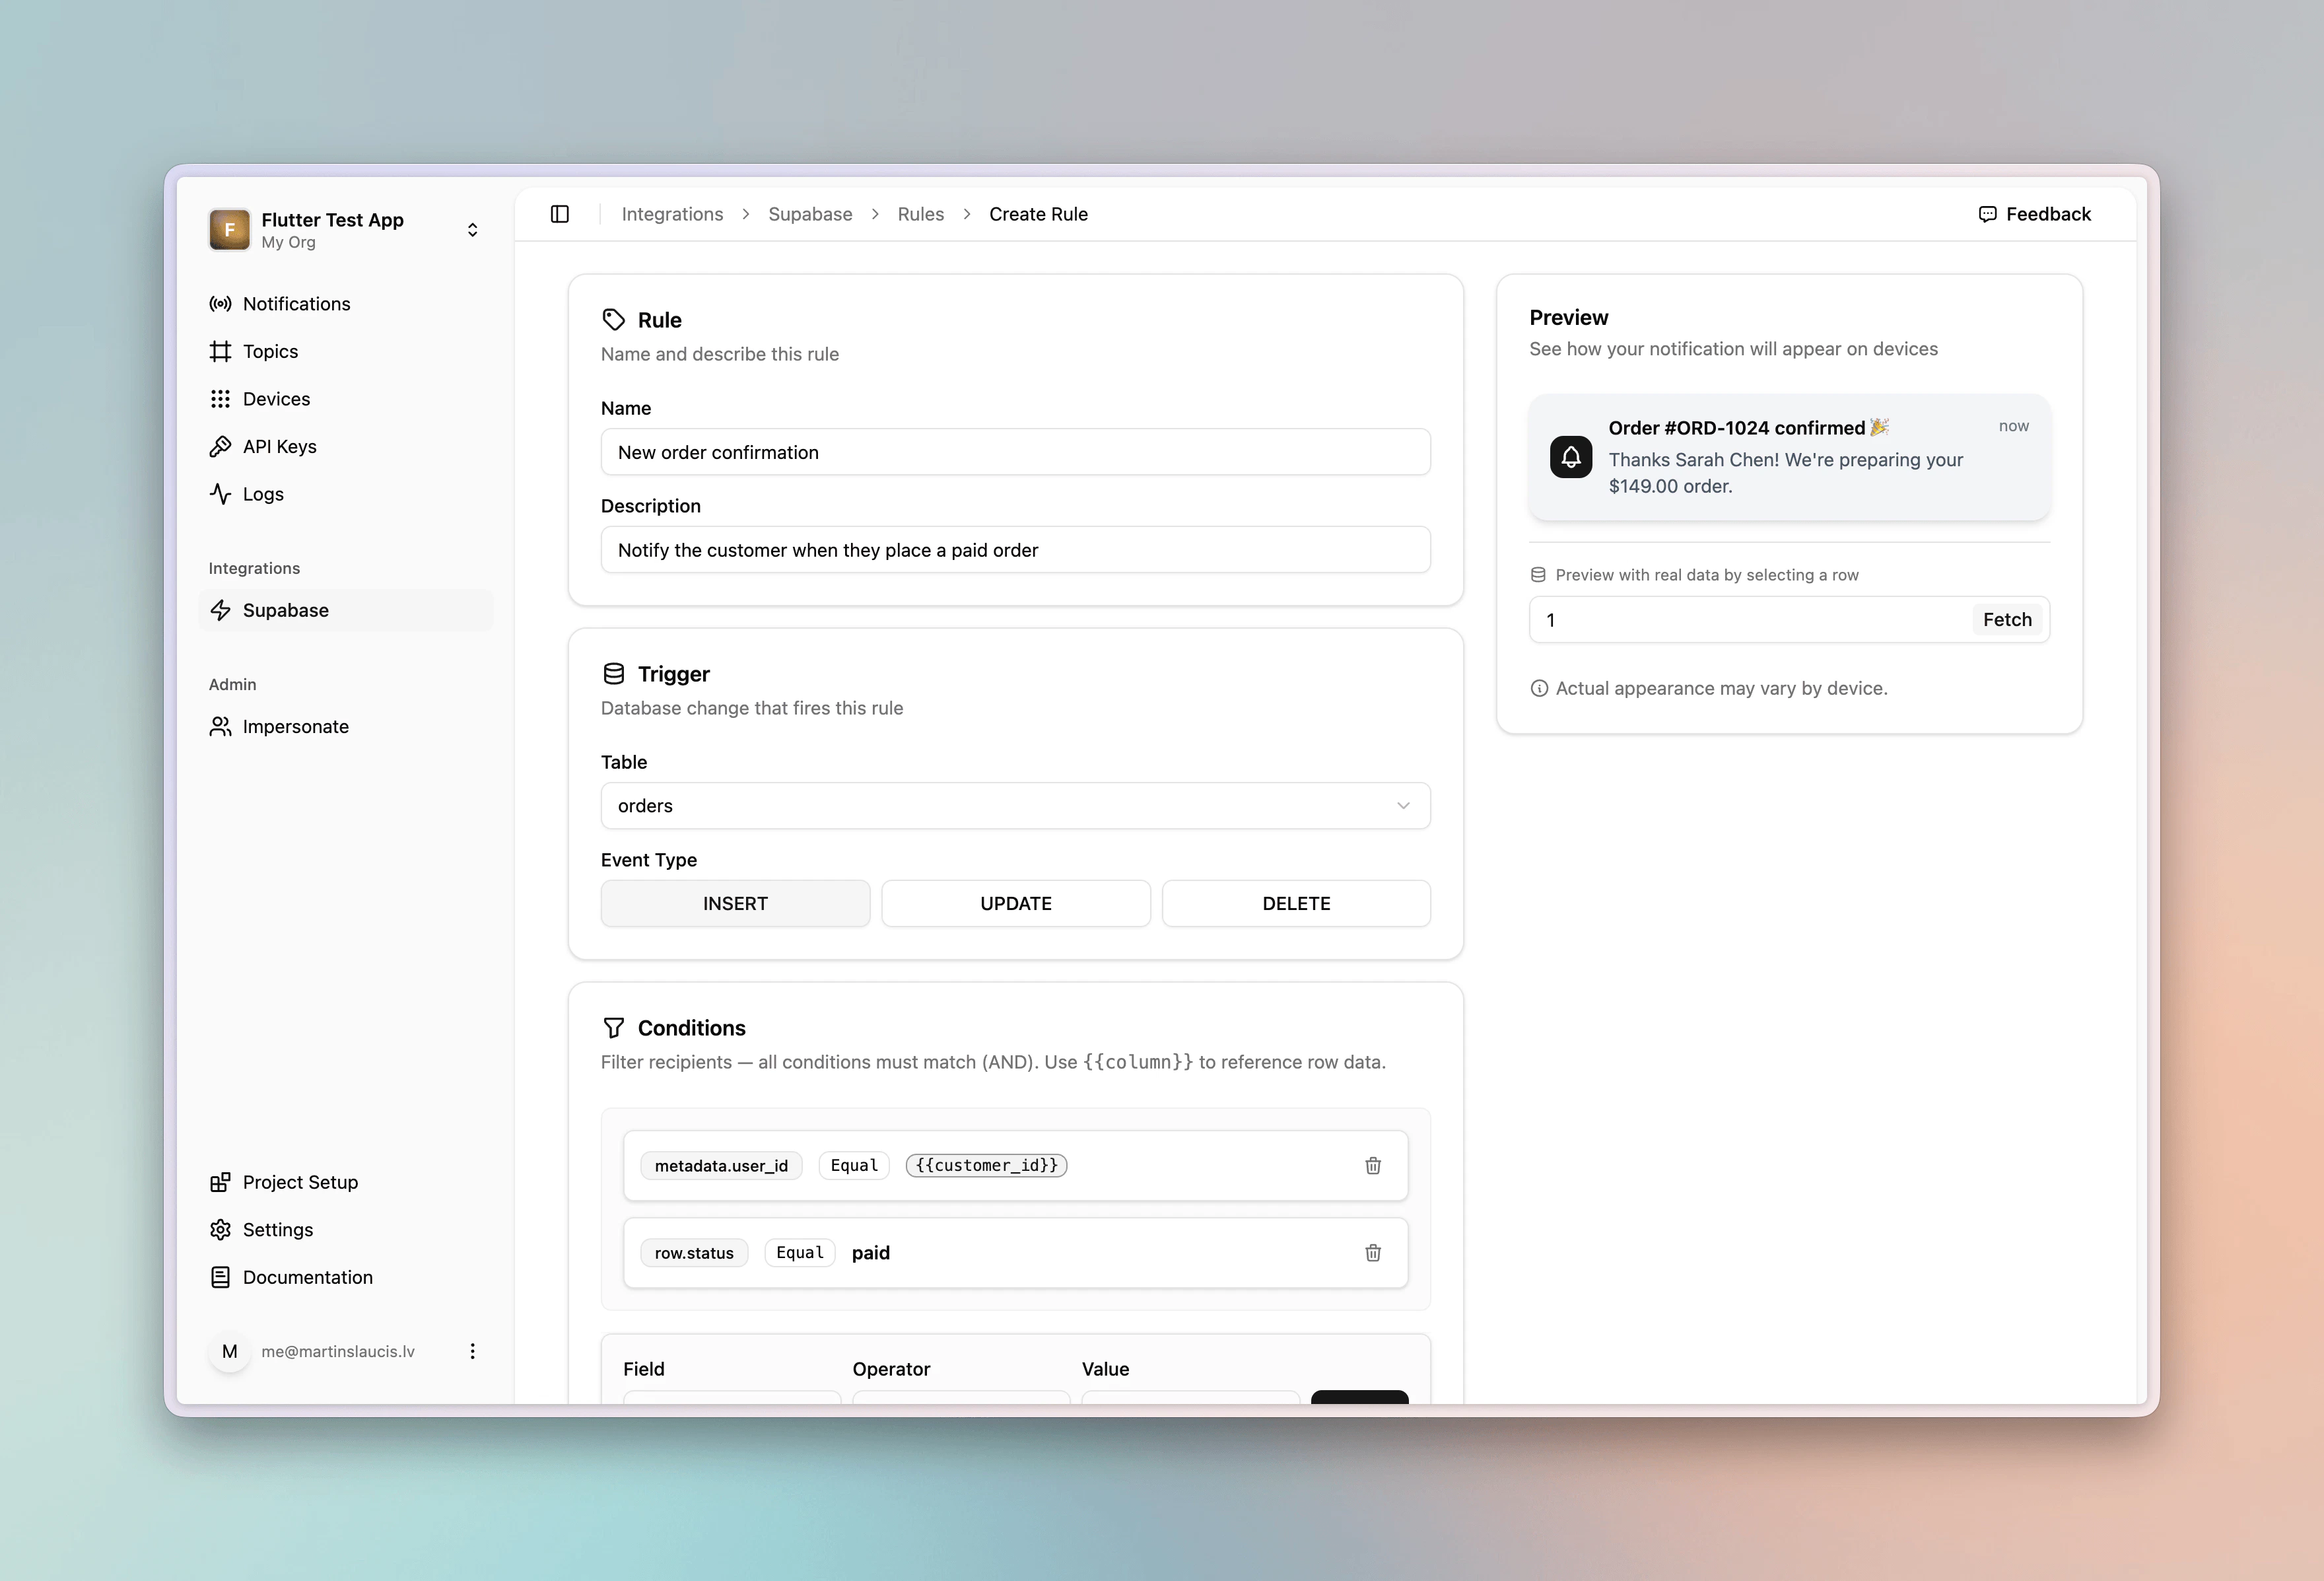
4. Configure the Template
Use{{column_name}} placeholders to pull values from the row directly into the notification:
- Title:
Order #{{order_number}} confirmed 🎉 - Body:
Thanks {{customer_name}}! We're preparing your ${{total}} order. - Link:
myapp://orders/{{order_number}}

5. Test It
Paste this into the Supabase SQL editor to trigger the rule:user_id = "user_123" in its metadata receives the push.
Use Cases
Orders is just one example. The same primitives (insert/update/delete triggers, row placeholders, metadata routing, and row conditions) work against any table you have. Chat messages, comments, friend requests, booking confirmations, low-stock alerts, content moderation flags, and anything else you store in Supabase can drive a push.
Two more rules built against the same orders table to show the range:
Order shipped fires on update when the status flips to shipped:
- Trigger:
orders/update - Title:
Your order is on its way! 📦 - Body:
Order #{{order_number}} shipped via {{carrier}} - Conditions:
metadata.user_idis_equal{{customer_id}}+row.statusis_equalshipped
insert when the total exceeds $200:
- Trigger:
orders/insert - Title:
Thank you for your order, {{customer_name}}! - Body:
Your ${{total}} order #{{order_number}} is being prepared with care - Conditions:
metadata.user_idis_equal{{customer_id}}+row.totalgreater_than200
Realtime chat
Chat is just another table. Say you store messages like this:insert rule that notifies the recipient whenever a new message lands:
- Trigger:
messages/insert - Title:
{{sender_name}} - Body:
{{body}} - Link:
myapp://conversations/{{conversation_id}} - Conditions:
metadata.user_idis_equal{{recipient_id}}
PNTA fires on the insert via Supabase Database Webhooks, independent of
Supabase Realtime. It works whether or not Realtime is enabled, and the two
run side by side.
Troubleshooting
No notification fires. Confirm that at least one device is registered with the matching field in its metadata (for this example,user_id set to the row’s customer_id). Without a metadata match, PNTA has no devices to deliver to.
Rule won’t save. Every rule must include at least one device filter, either a metadata.* or an identifiers.* condition. PNTA uses it to match the incoming row to specific devices, so without it there’s no way to determine who should receive the push and the rule can’t be saved.
Resources
Supabase
Learn more about Supabase