Prerequisites
- n8n instance (self-hosted or cloud)
- PNTA account with project ID (
prj_XXXXXXXXX) - API key created in PNTA Dashboard
- Platform keys configured in PNTA Dashboard (see Platform Keys Setup)
Setup Steps
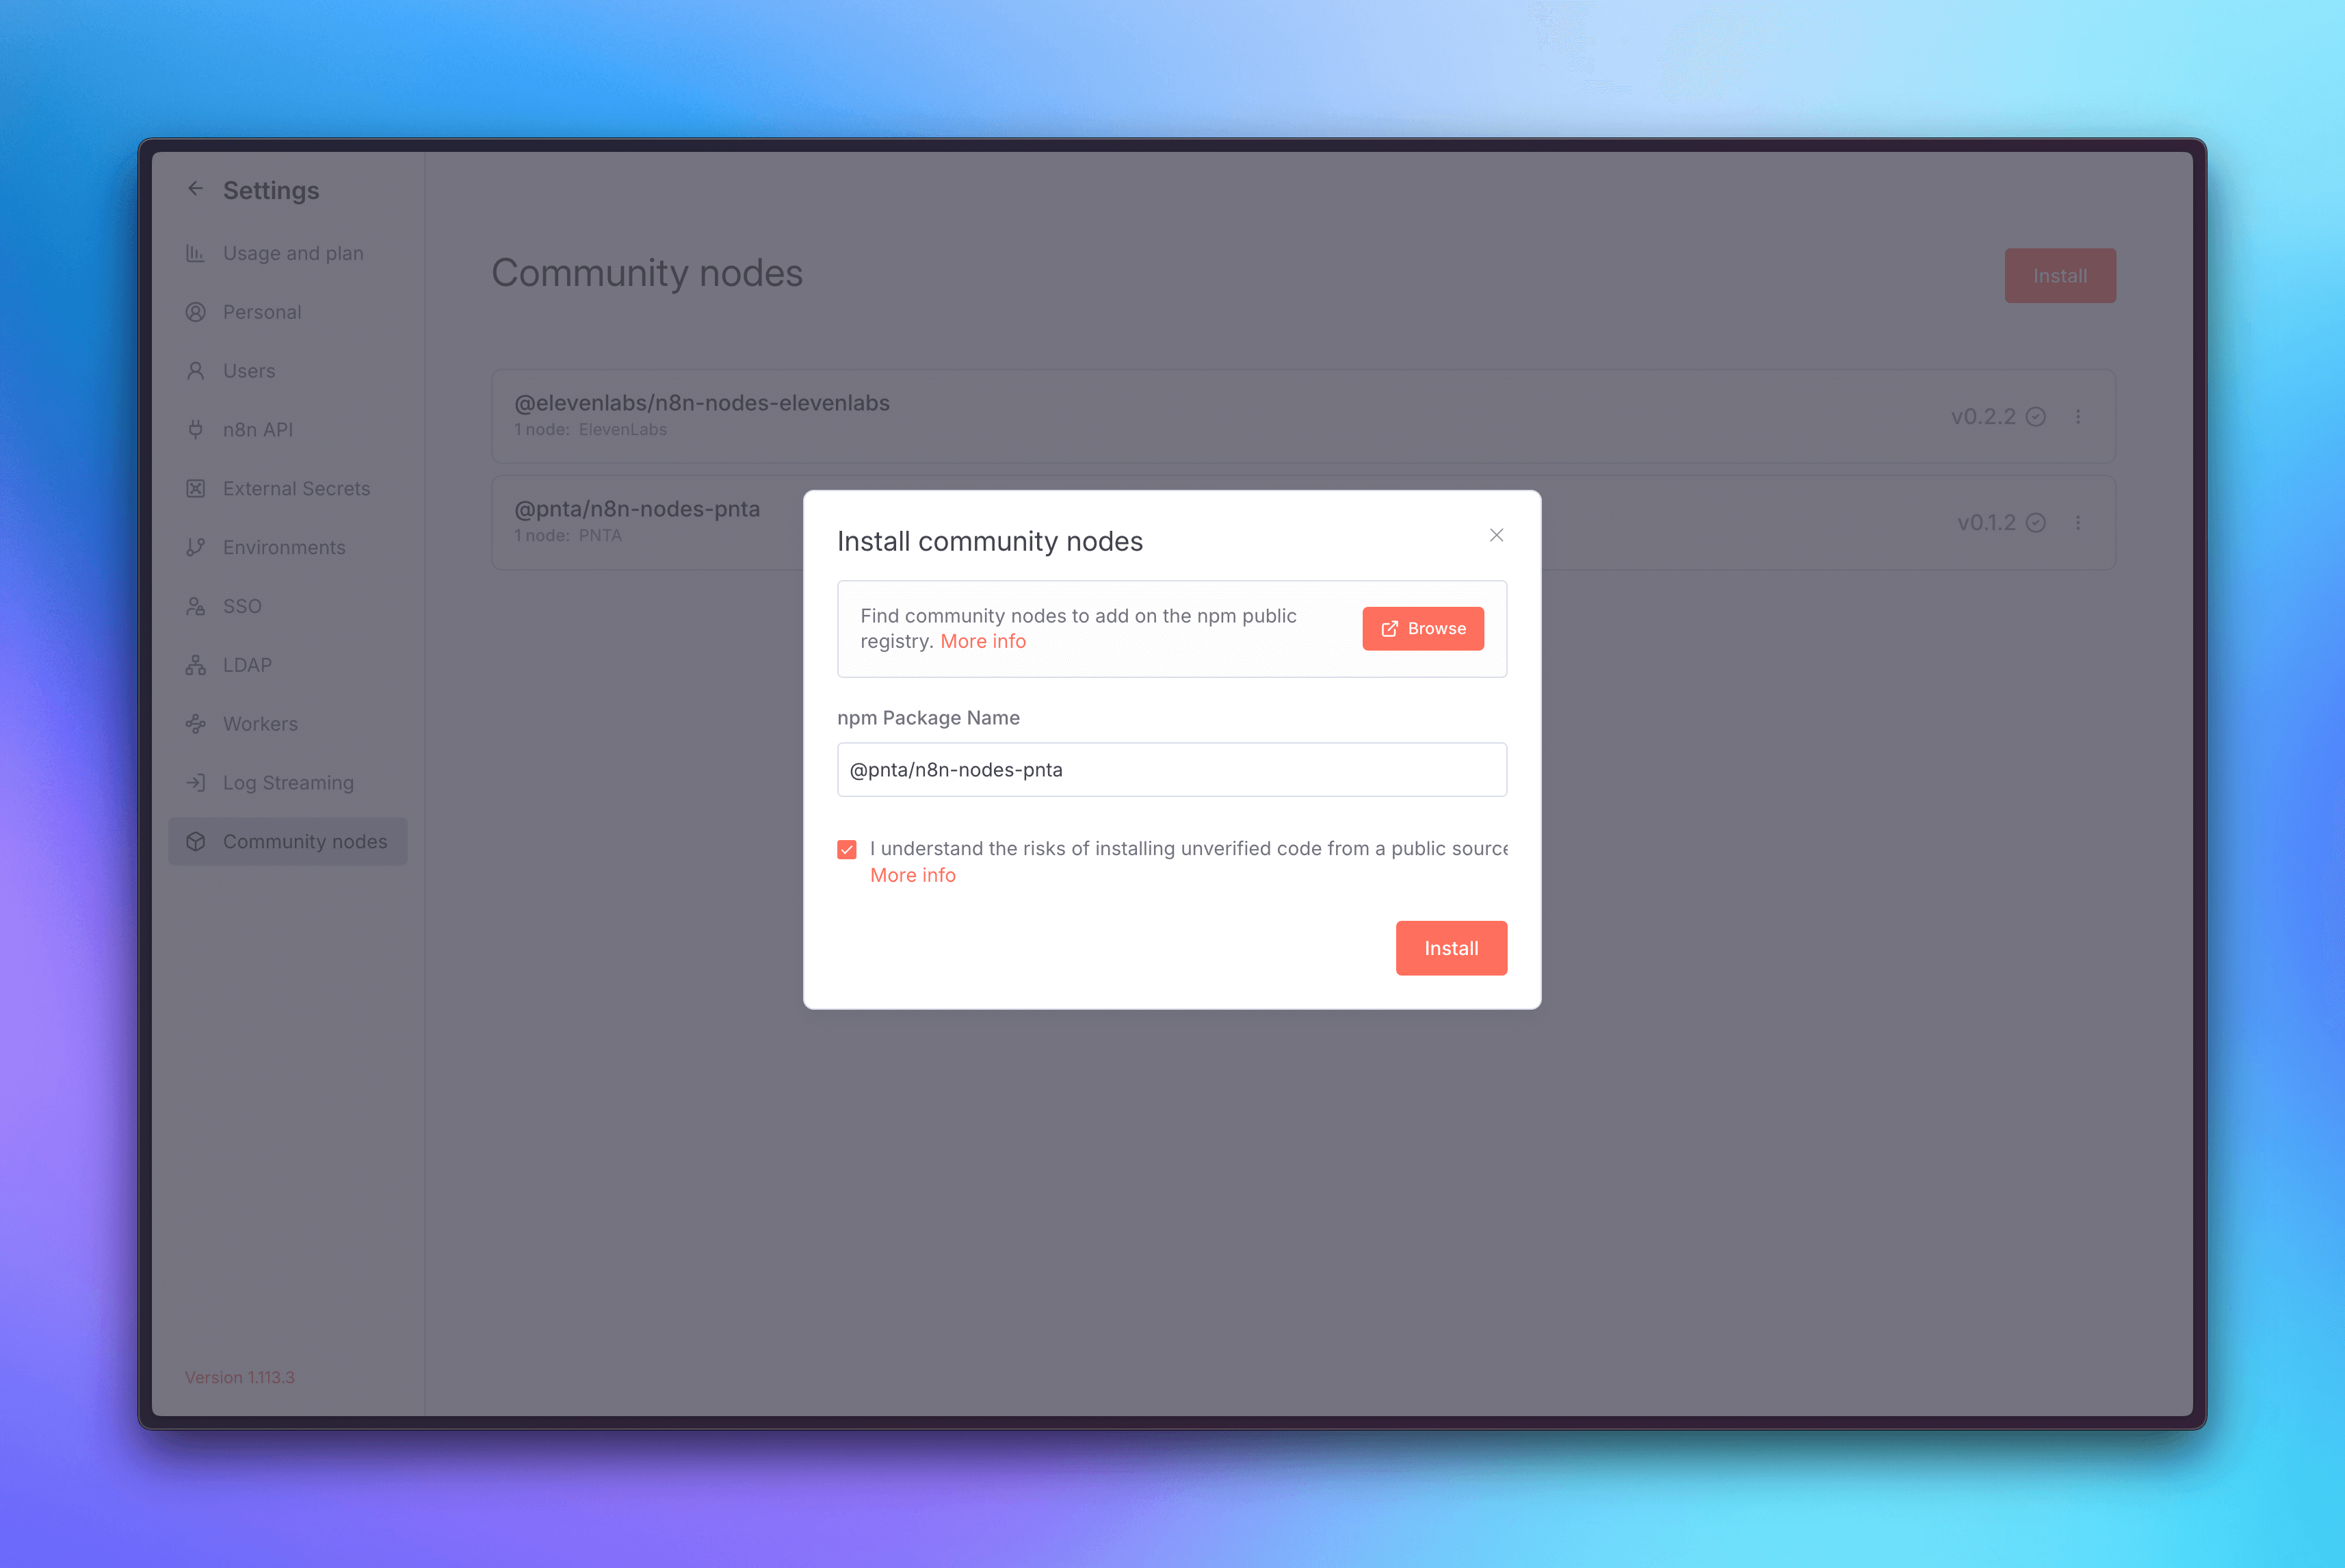
1. Install PNTA Node
- Go to Settings → Community nodes
- Click Install
- Enter
@pnta/n8n-nodes-pntaas the package name - Click Install to add the PNTA node to your n8n instance
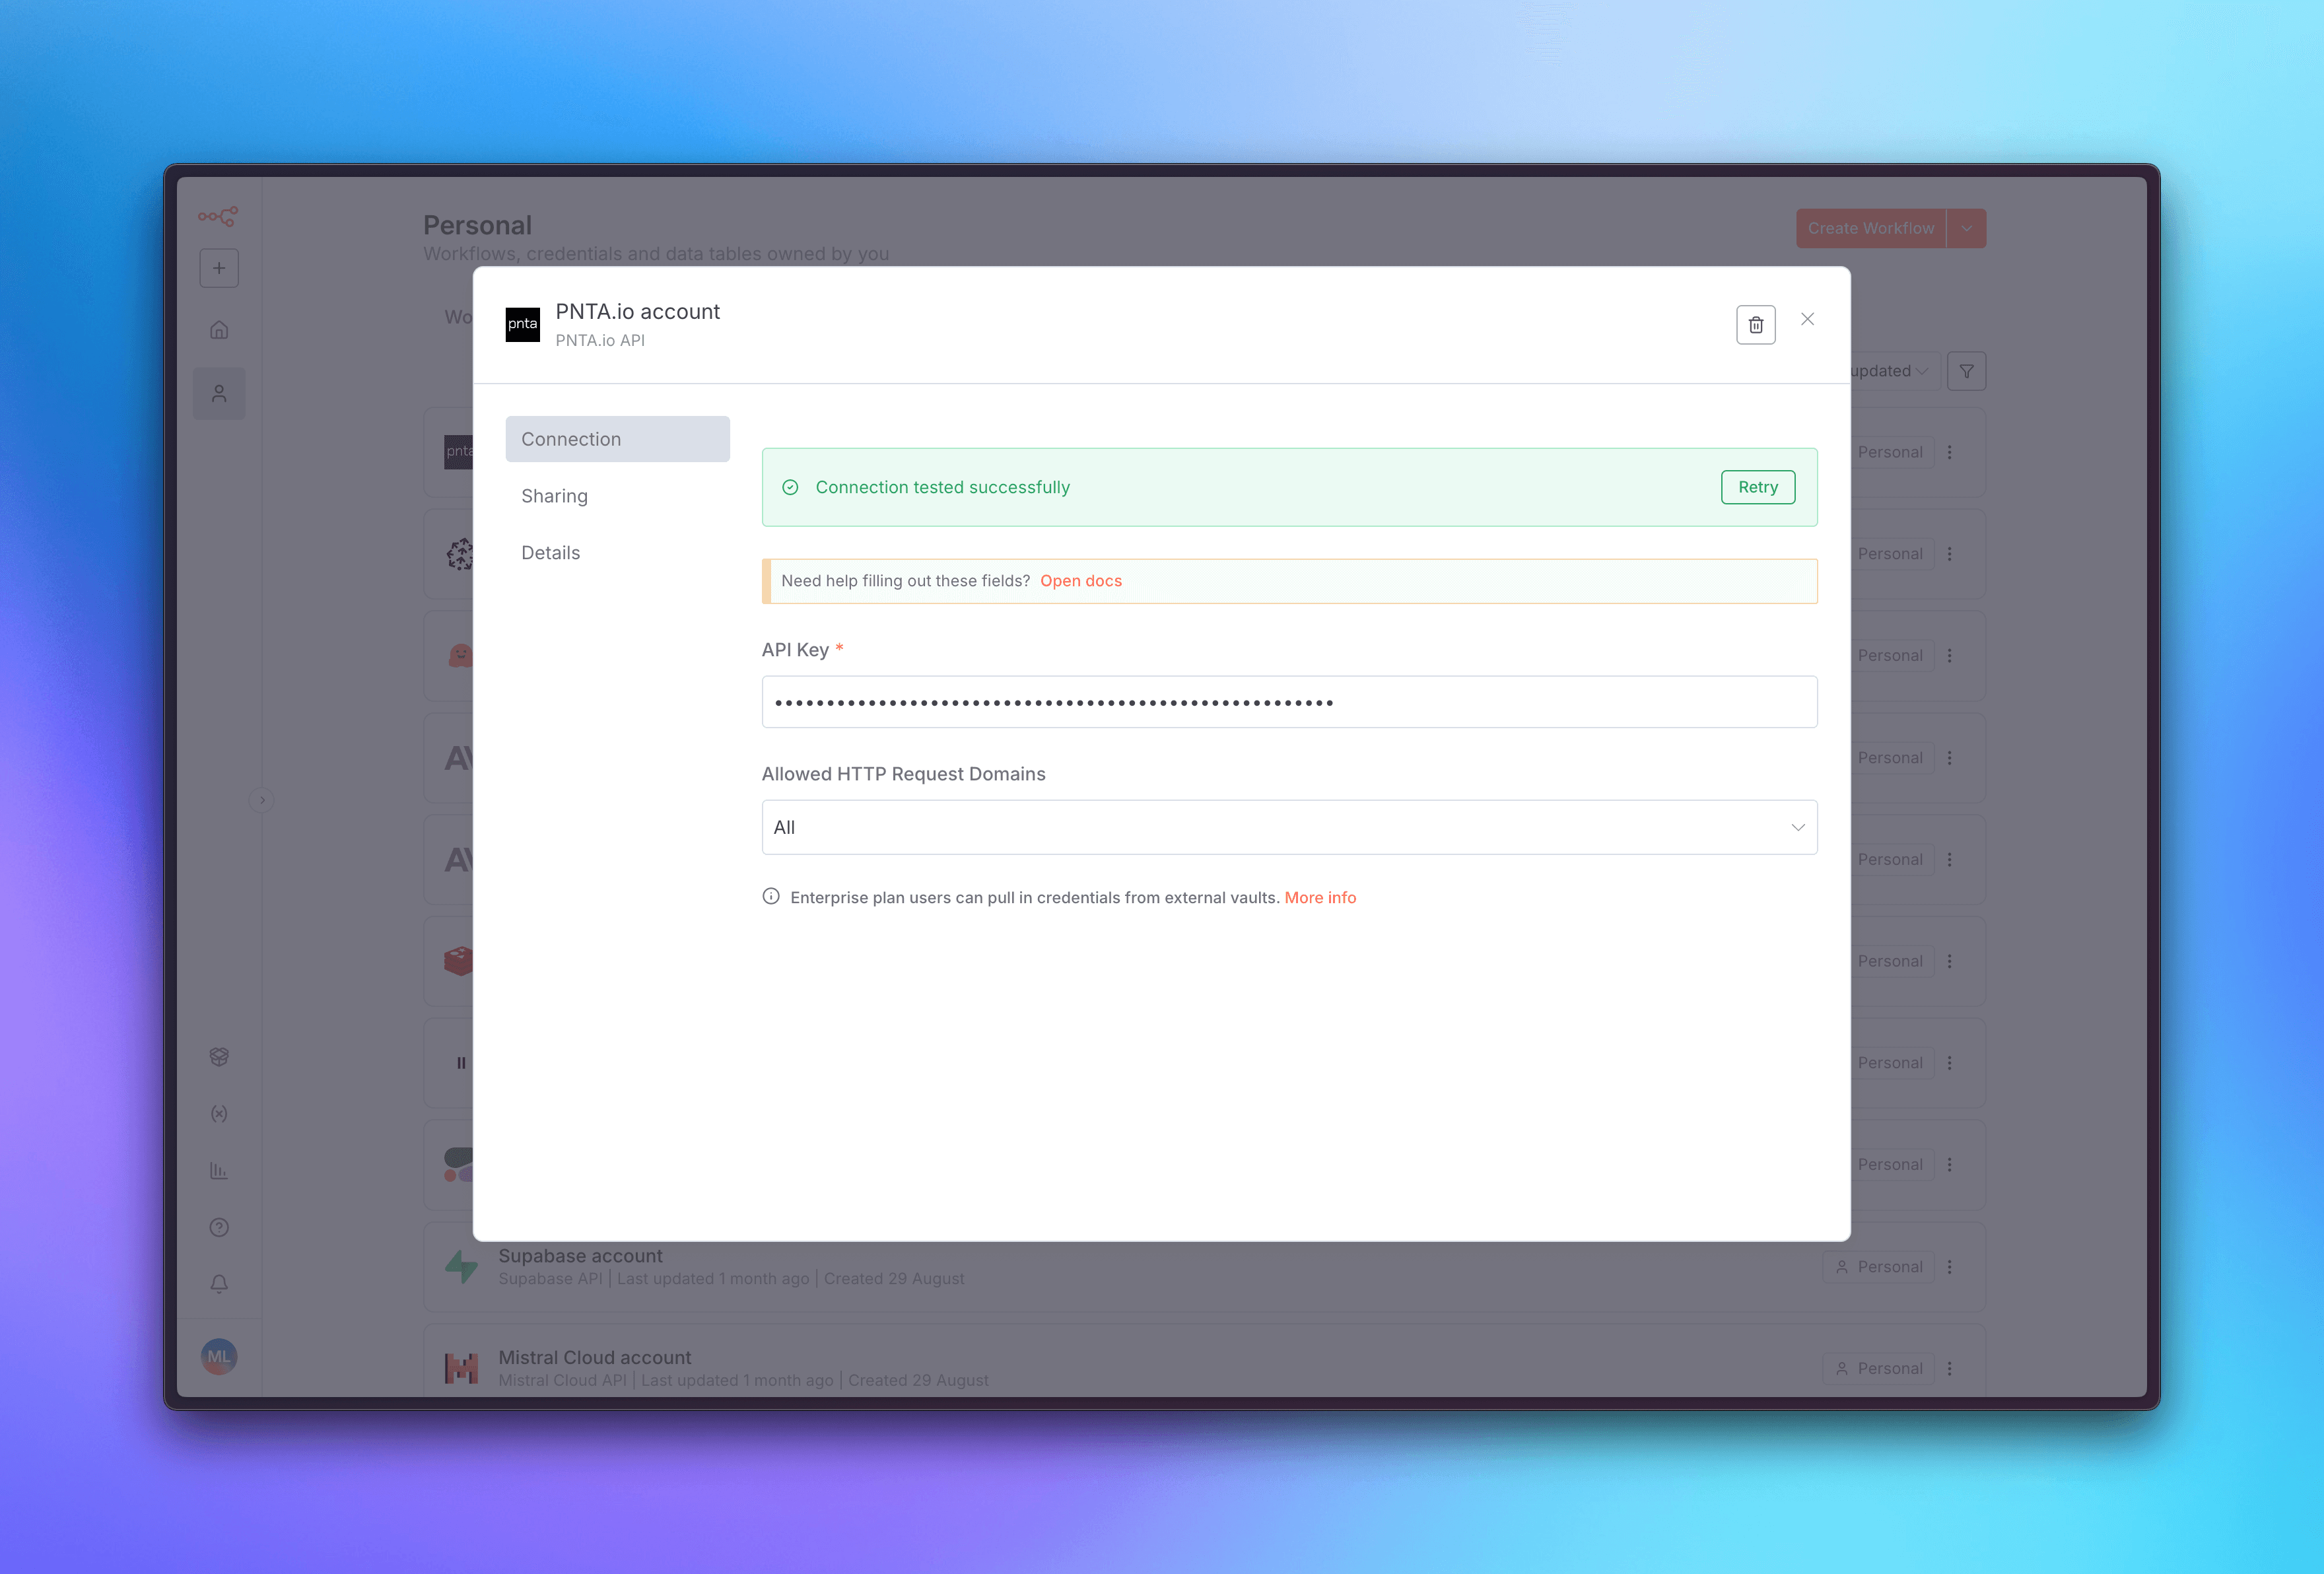
2. Configure Authentication
- Go back to your n8n dashboard
- Click on Create credential in the top right corner
- Search for PNTA and select it
- Add the API key you created for your project in the PNTA Dashboard
- Save the credential
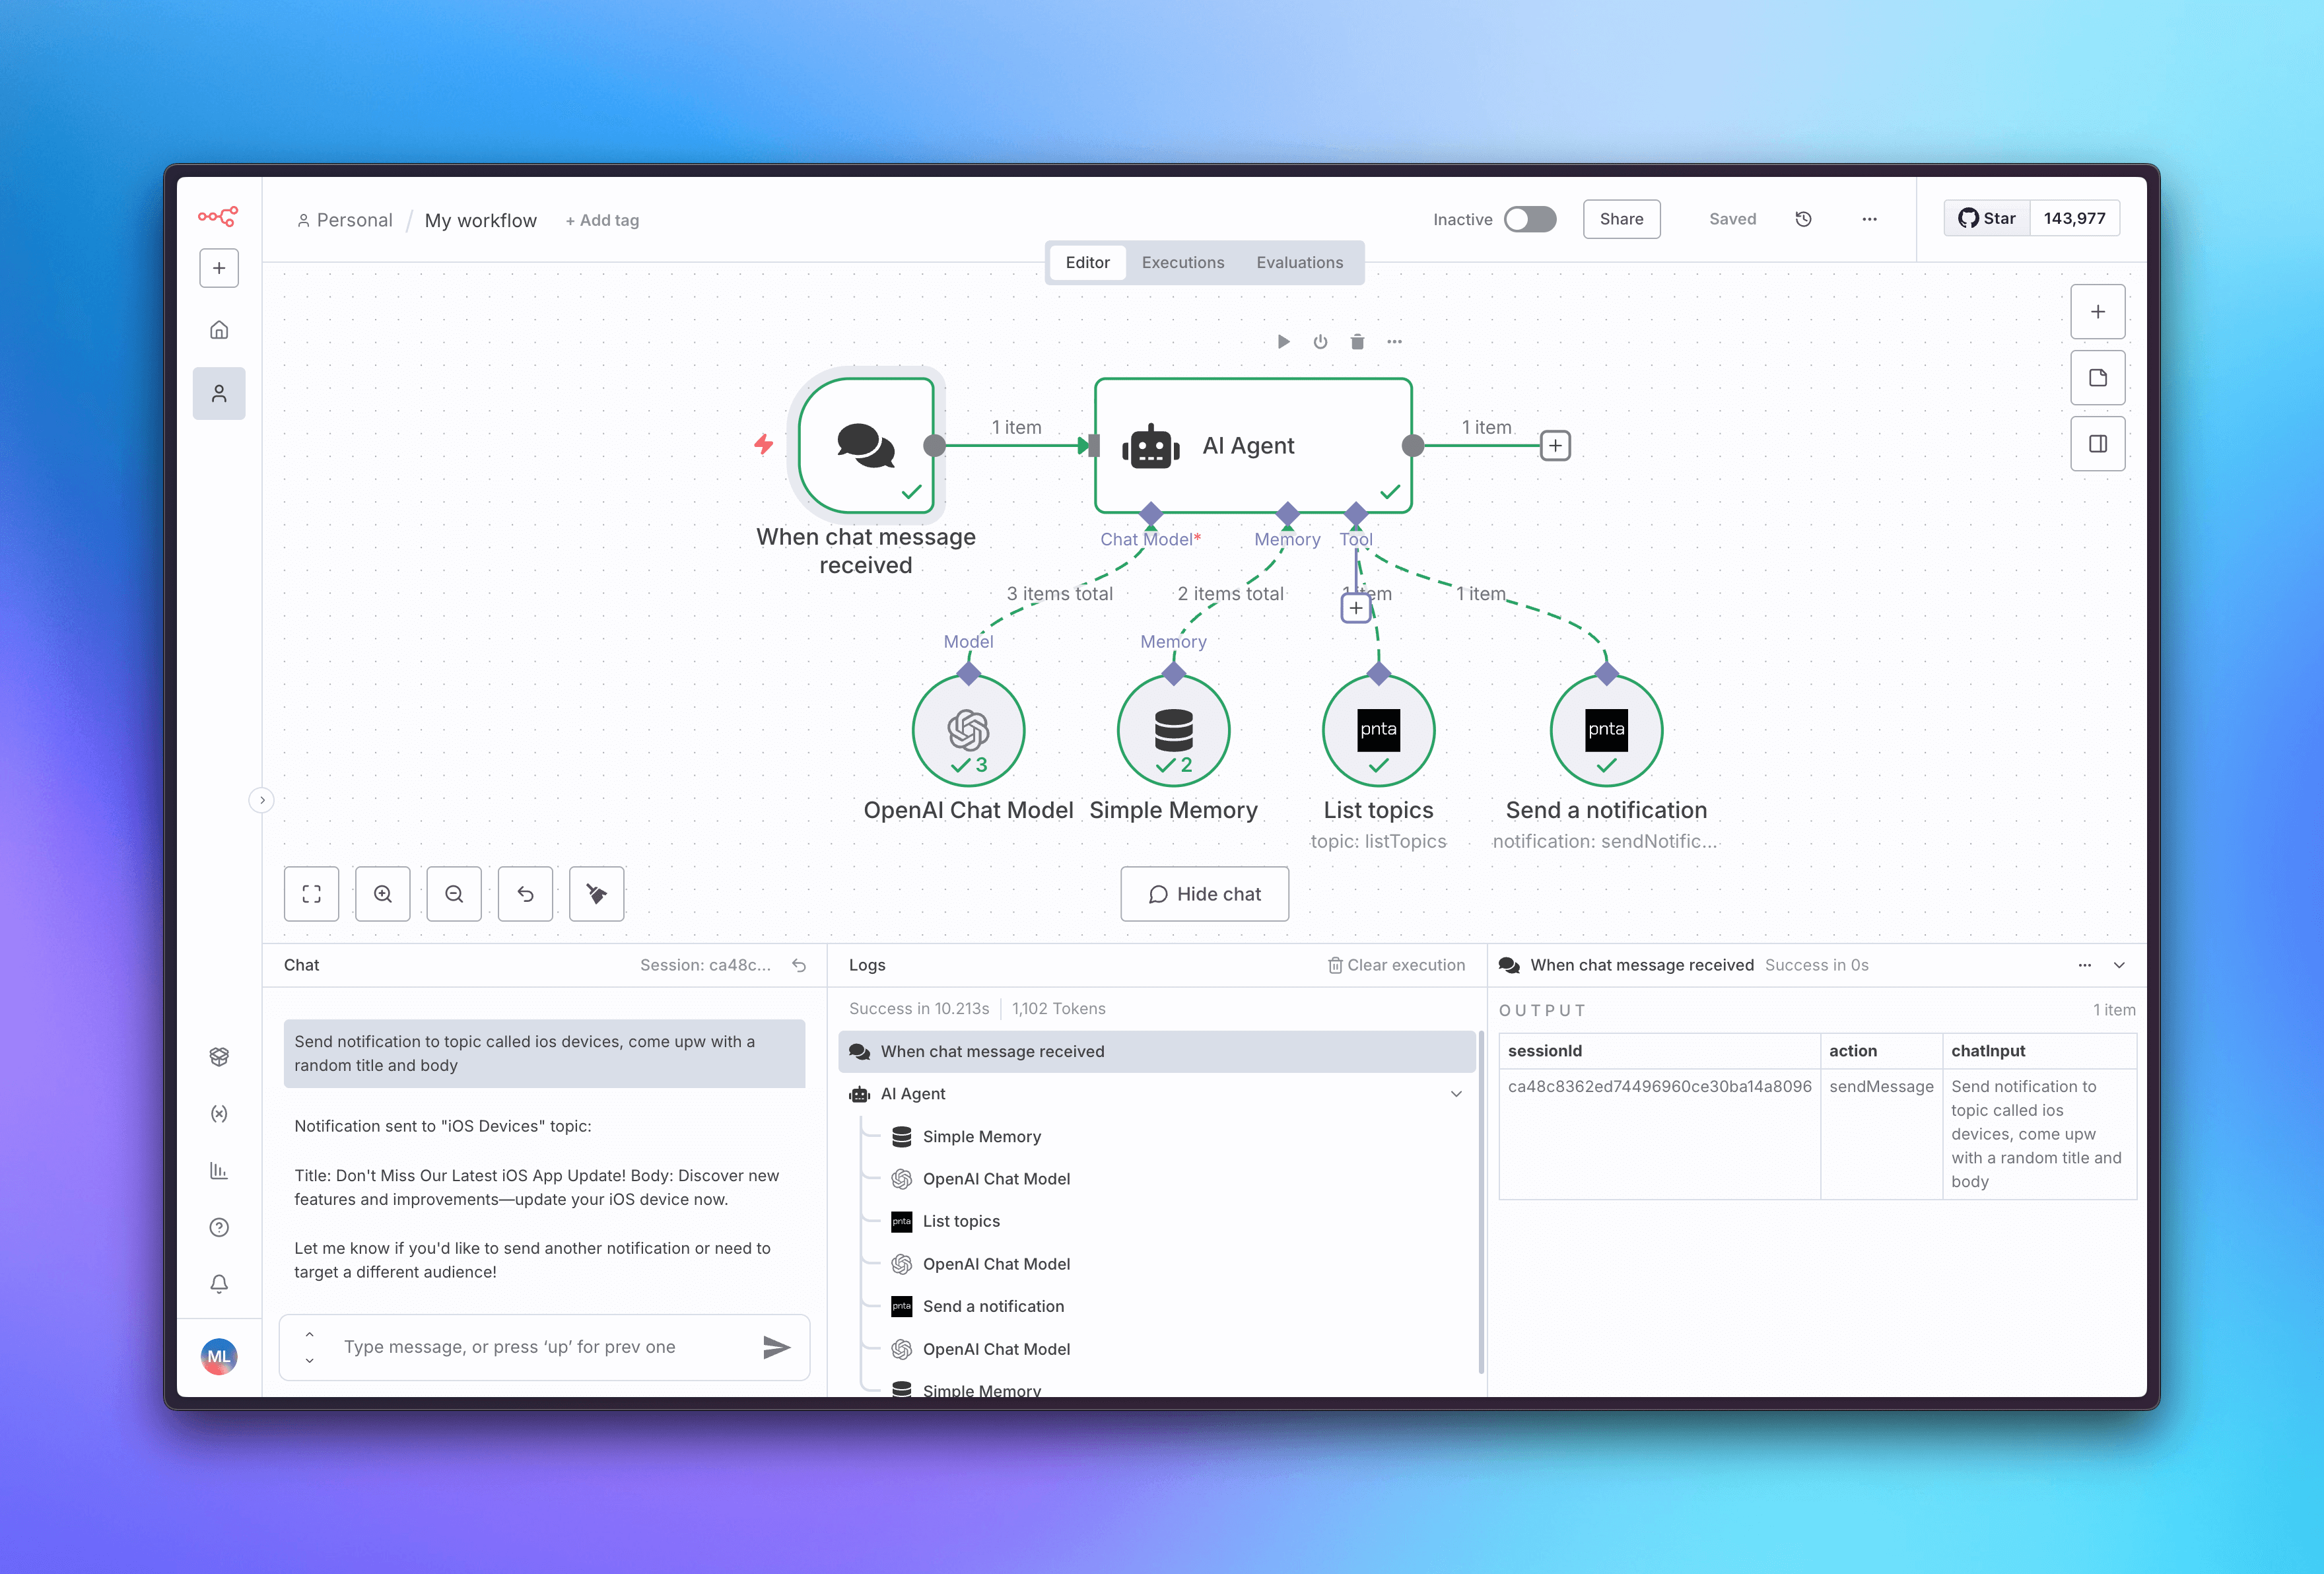
3. Create Your First Workflow
Now you’re ready to create powerful workflows with PNTA! You can use PNTA nodes in various ways: Webhook-Triggered Notifications:- Create a workflow that starts with a Webhook node
- Add a PNTA node to send push notifications when the webhook is triggered
- Perfect for real-time notifications from external systems
- Use PNTA nodes within AI agent workflows
- Send notifications based on AI analysis or decision-making
- Create intelligent notification systems that respond to data patterns
- Combine Cron or Schedule Trigger nodes with PNTA nodes
- Send regular updates, reminders, or status notifications
- Automate recurring communication with your users
- Use IF nodes to create smart notification logic
- Send different messages based on user data, time, or other conditions
- Build sophisticated notification strategies
Need help with self-hosted n8n? If you need assistance setting up a
self-hosted n8n instance, we’re here to help! Just reach out to
[email protected] and we’ll get you sorted with your
own n8n deployment.
Resources
PNTA n8n Node
Official PNTA node for n8n workflows
n8n
Learn more about PNTA integration with n8n