Prerequisites
- FlutterFlow account and project
- PNTA account with project ID (
prj_XXXXXXXXX) - For Android: Firebase project
- For iOS: Apple Developer account
- Platform keys configured in PNTA Dashboard (see Platform Keys Setup)
Setup Steps
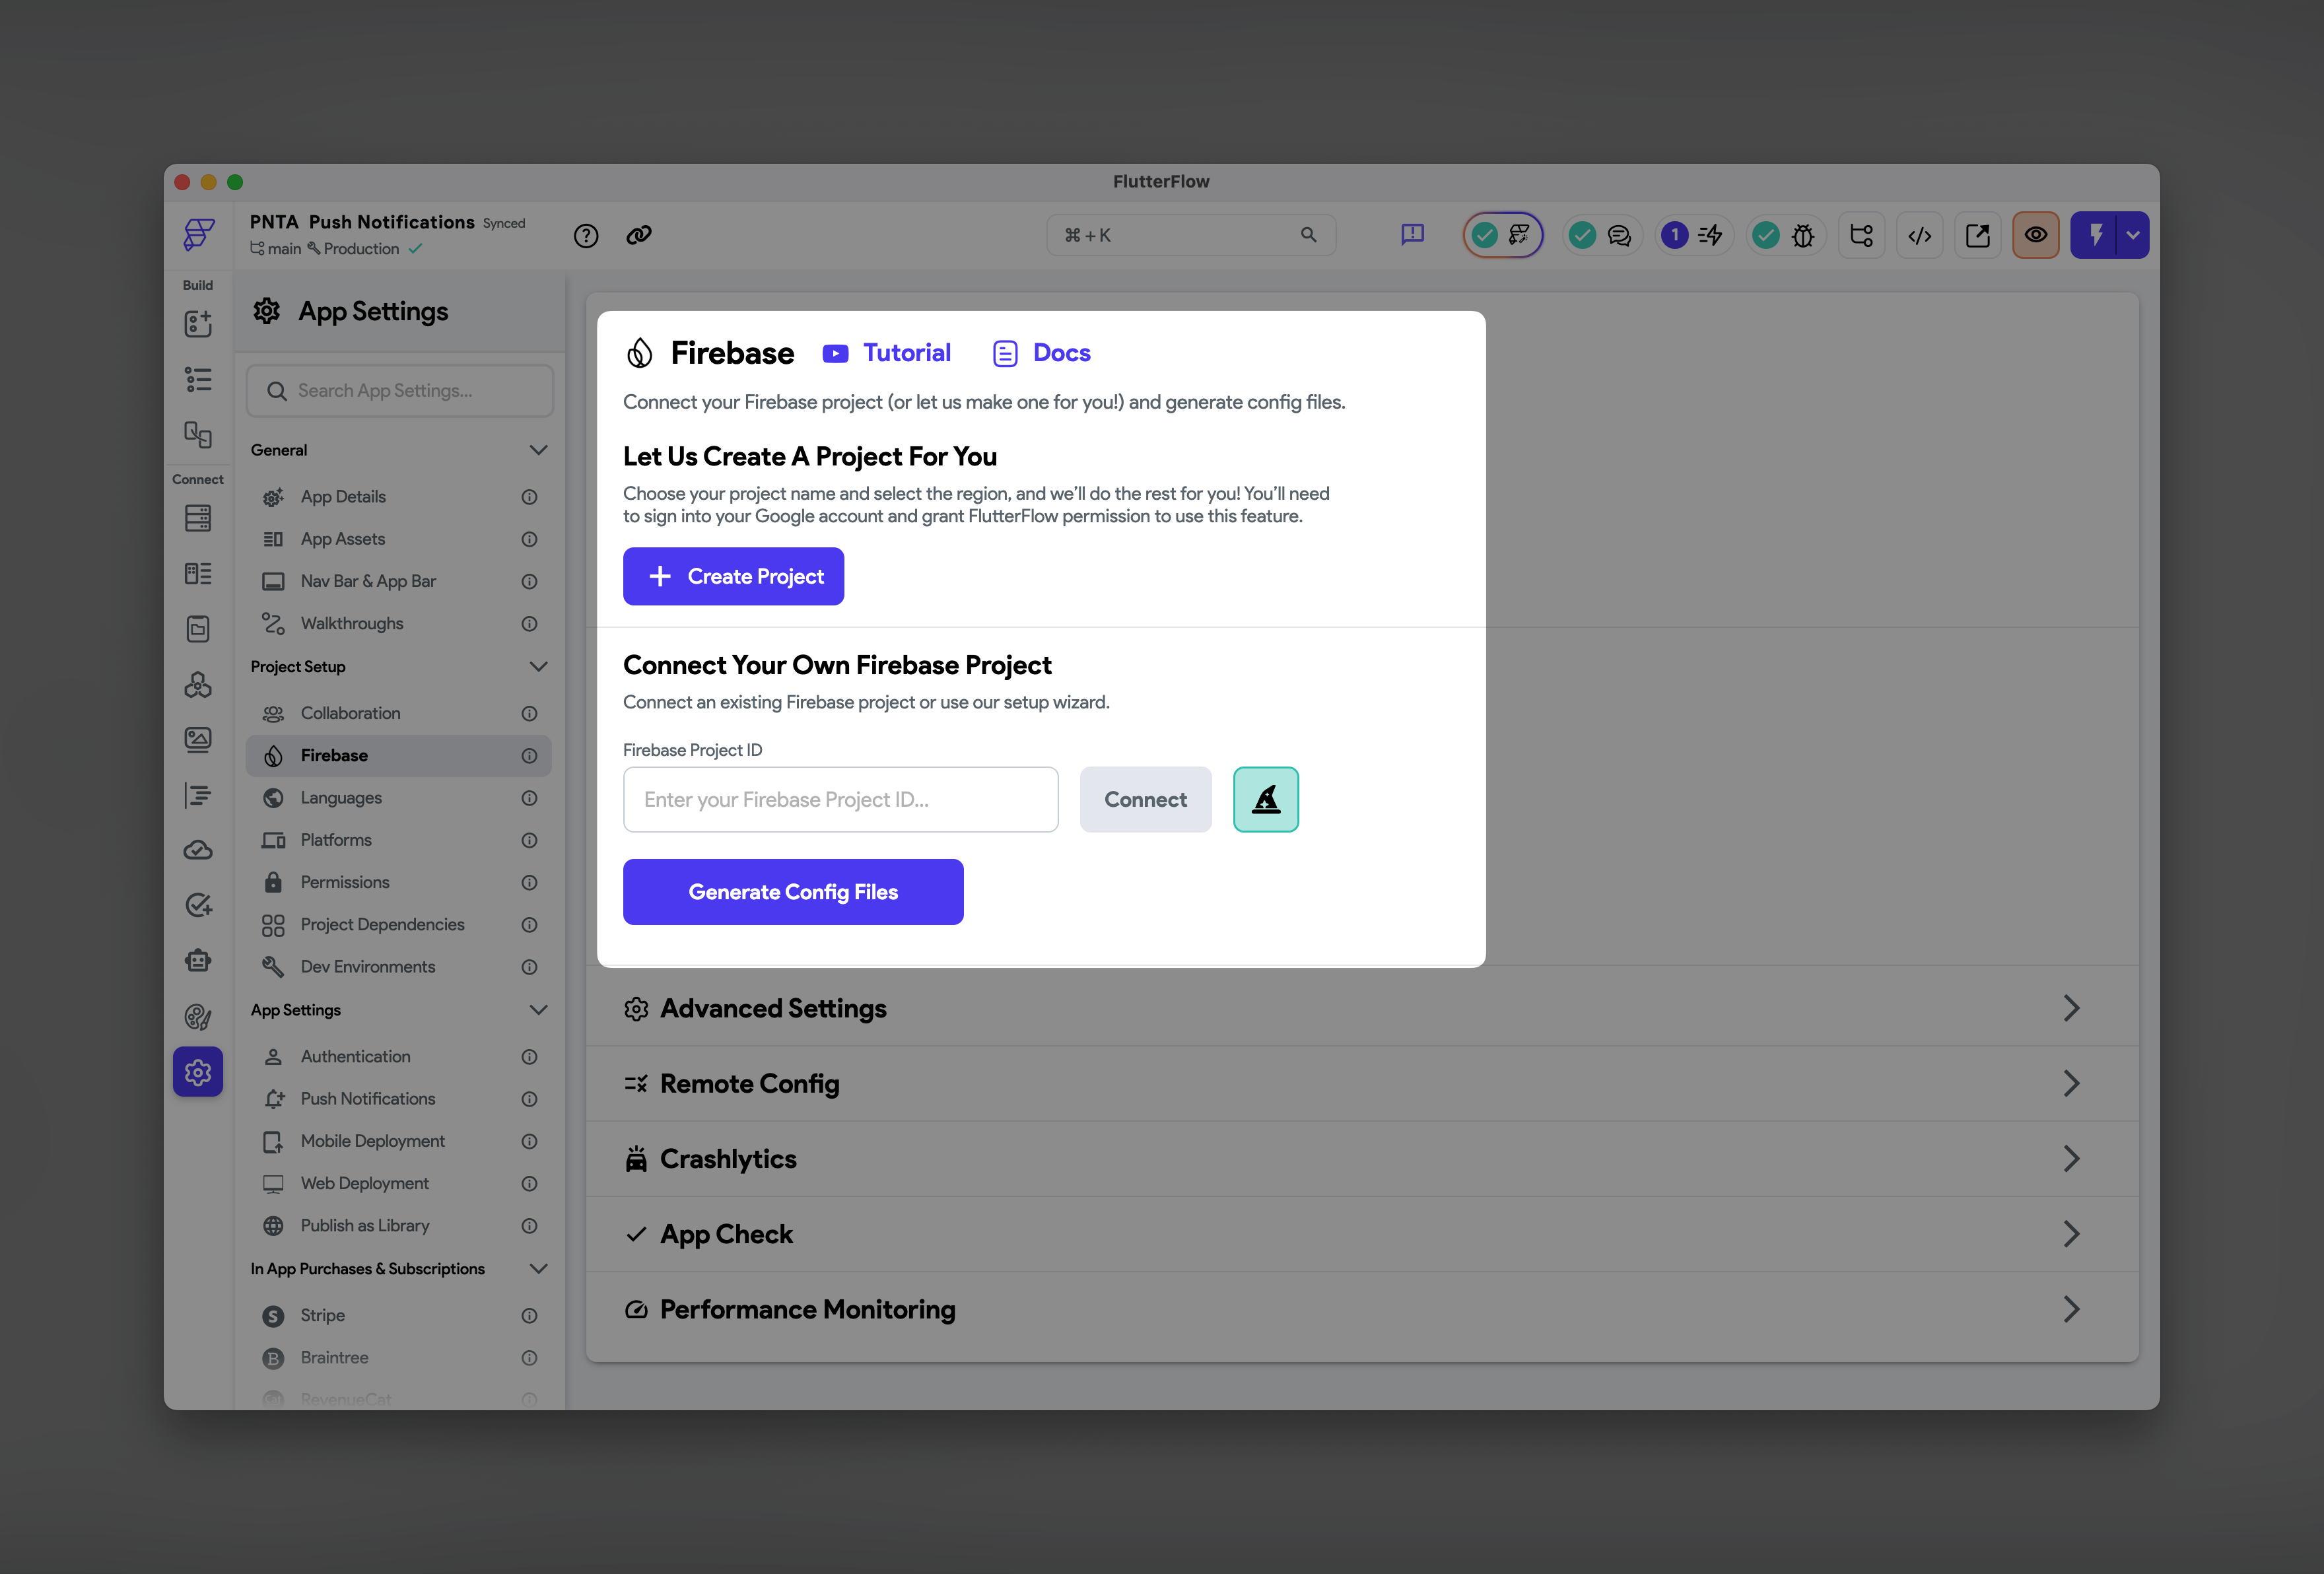
1. Firebase Configuration (Android Only)
In FlutterFlow, set up Firebase for Android (FlutterFlow handles all the configuration automatically):- Go to Settings → Firebase
- Either create a new Firebase project or connect an existing one
- Click Generate Config Files
- FlutterFlow will handle the
google-services.jsonsetup automatically
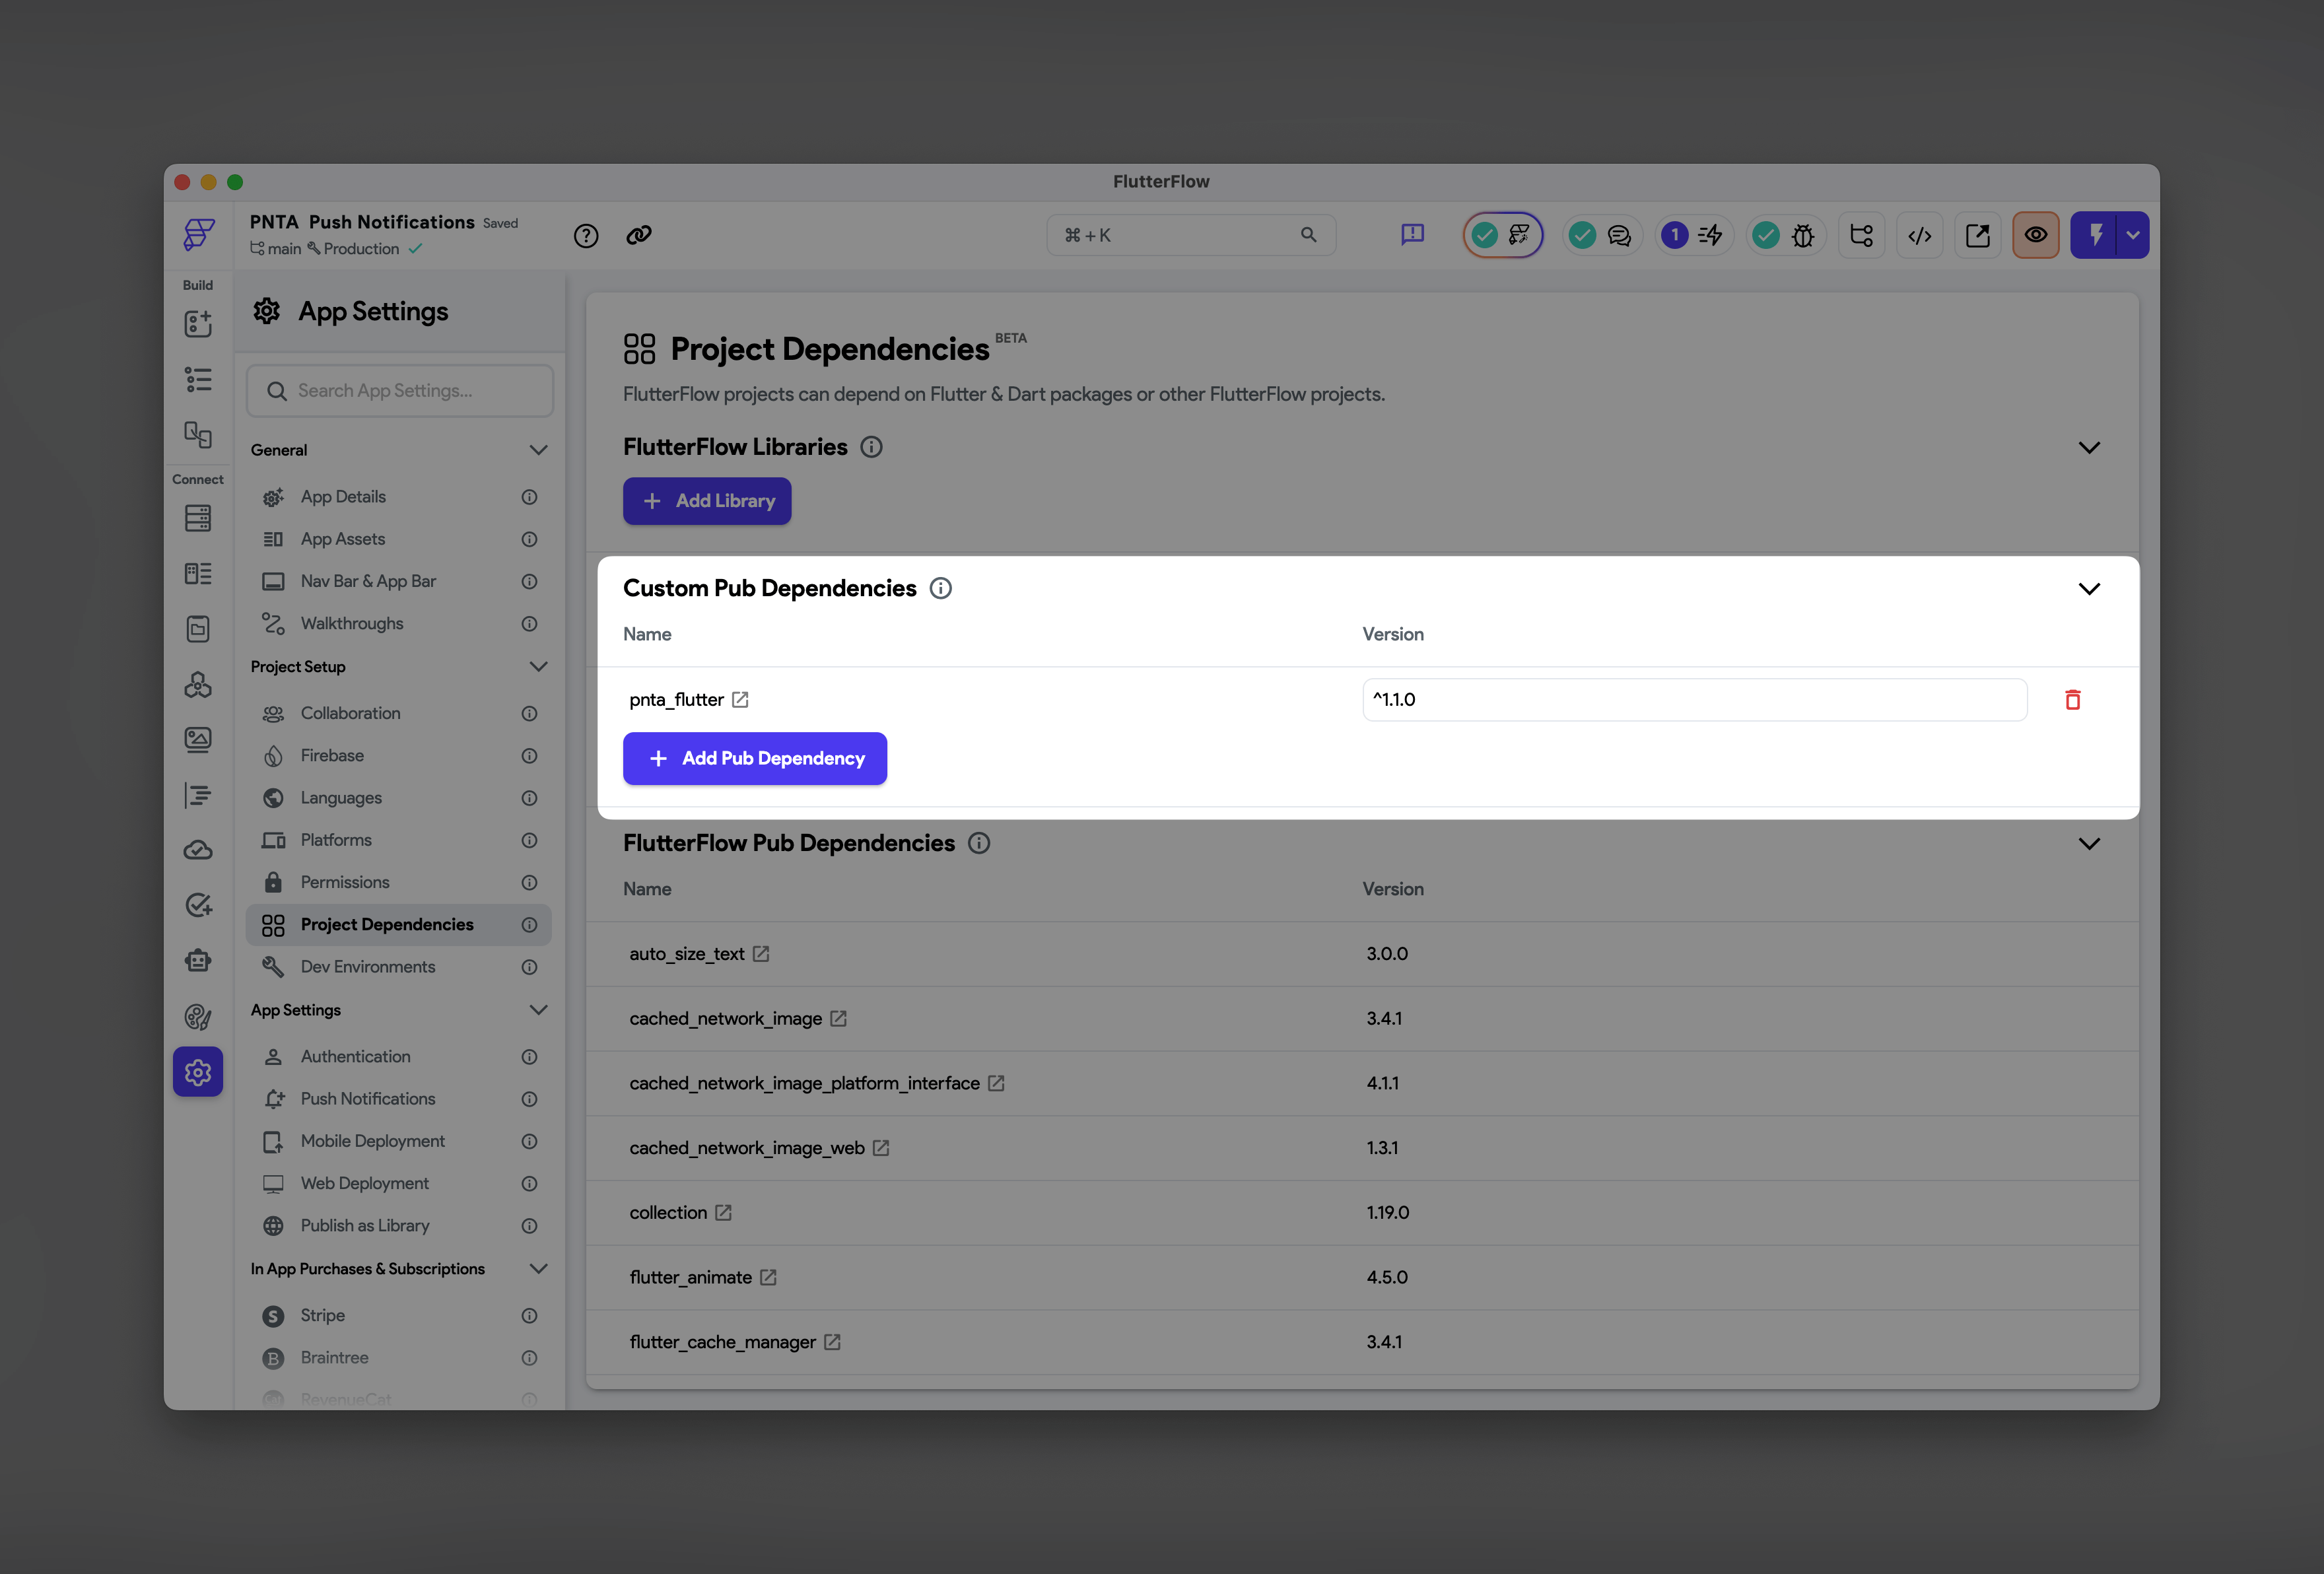
2. Add PNTA Dependency
- Go to Settings → Project Dependencies
- Click Add Pub Dependency
- Visit pub.dev/packages/pnta_flutter
- Copy the latest version and paste it into FlutterFlow
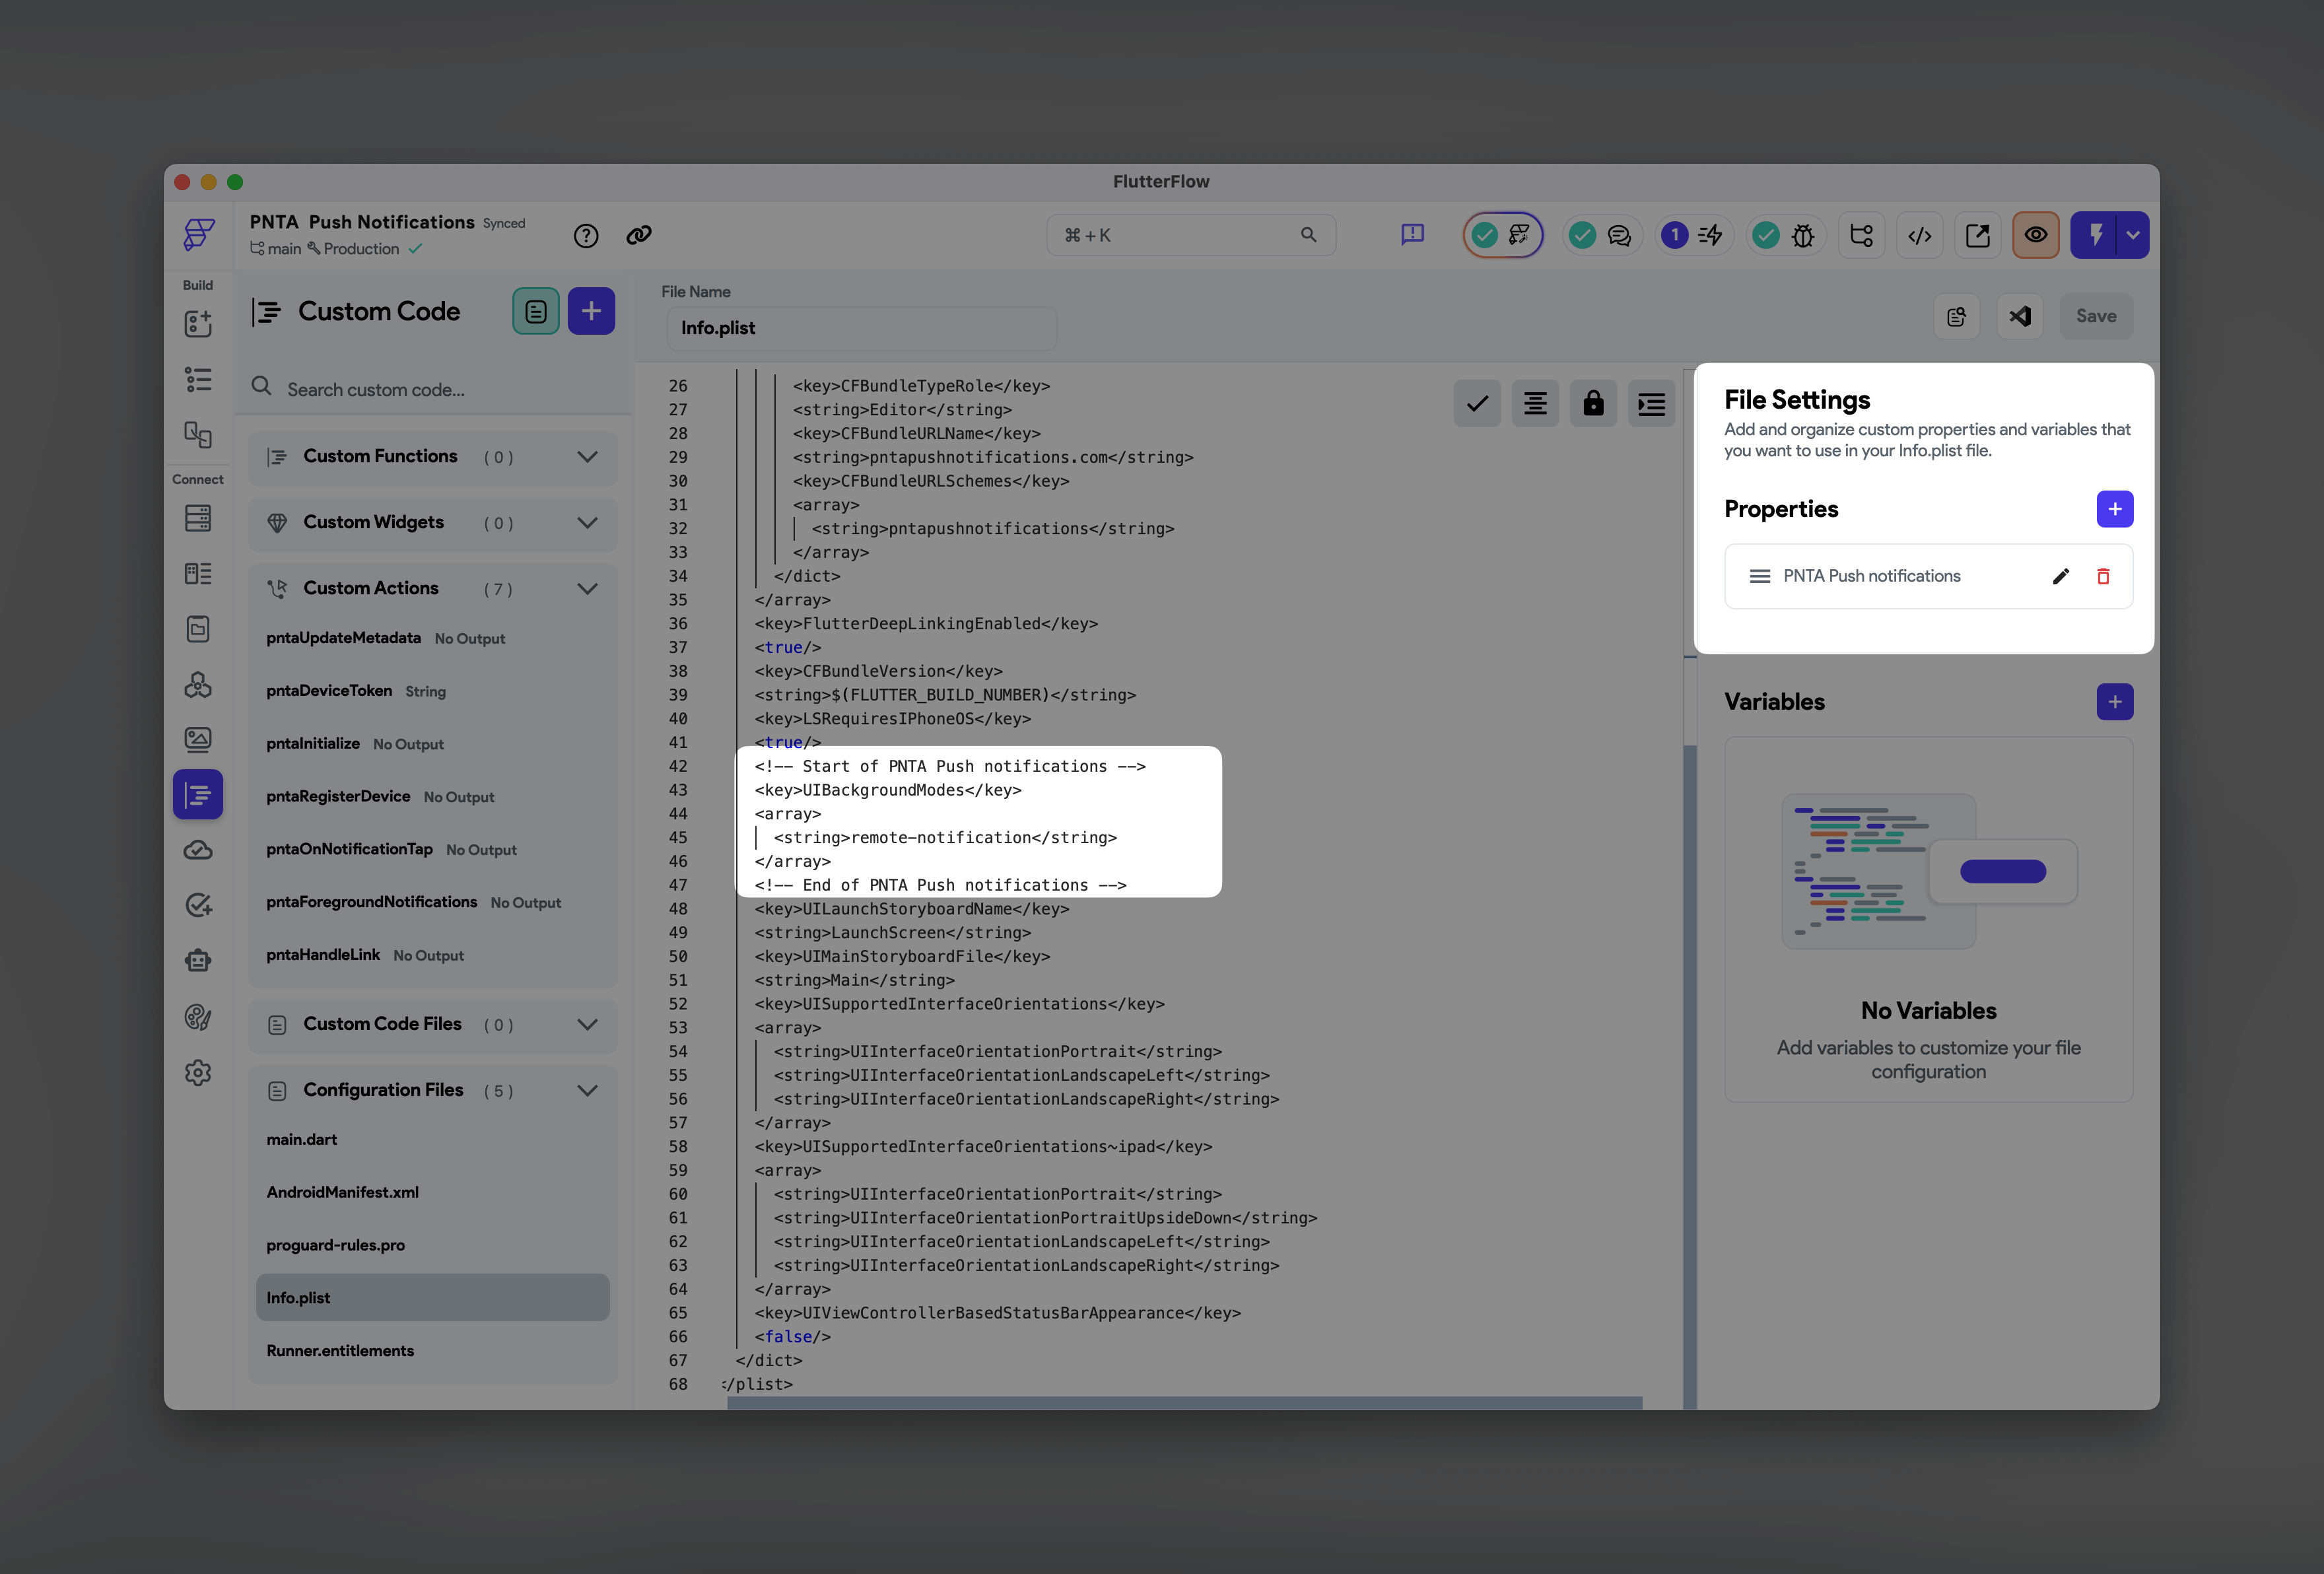
3. iOS Configuration
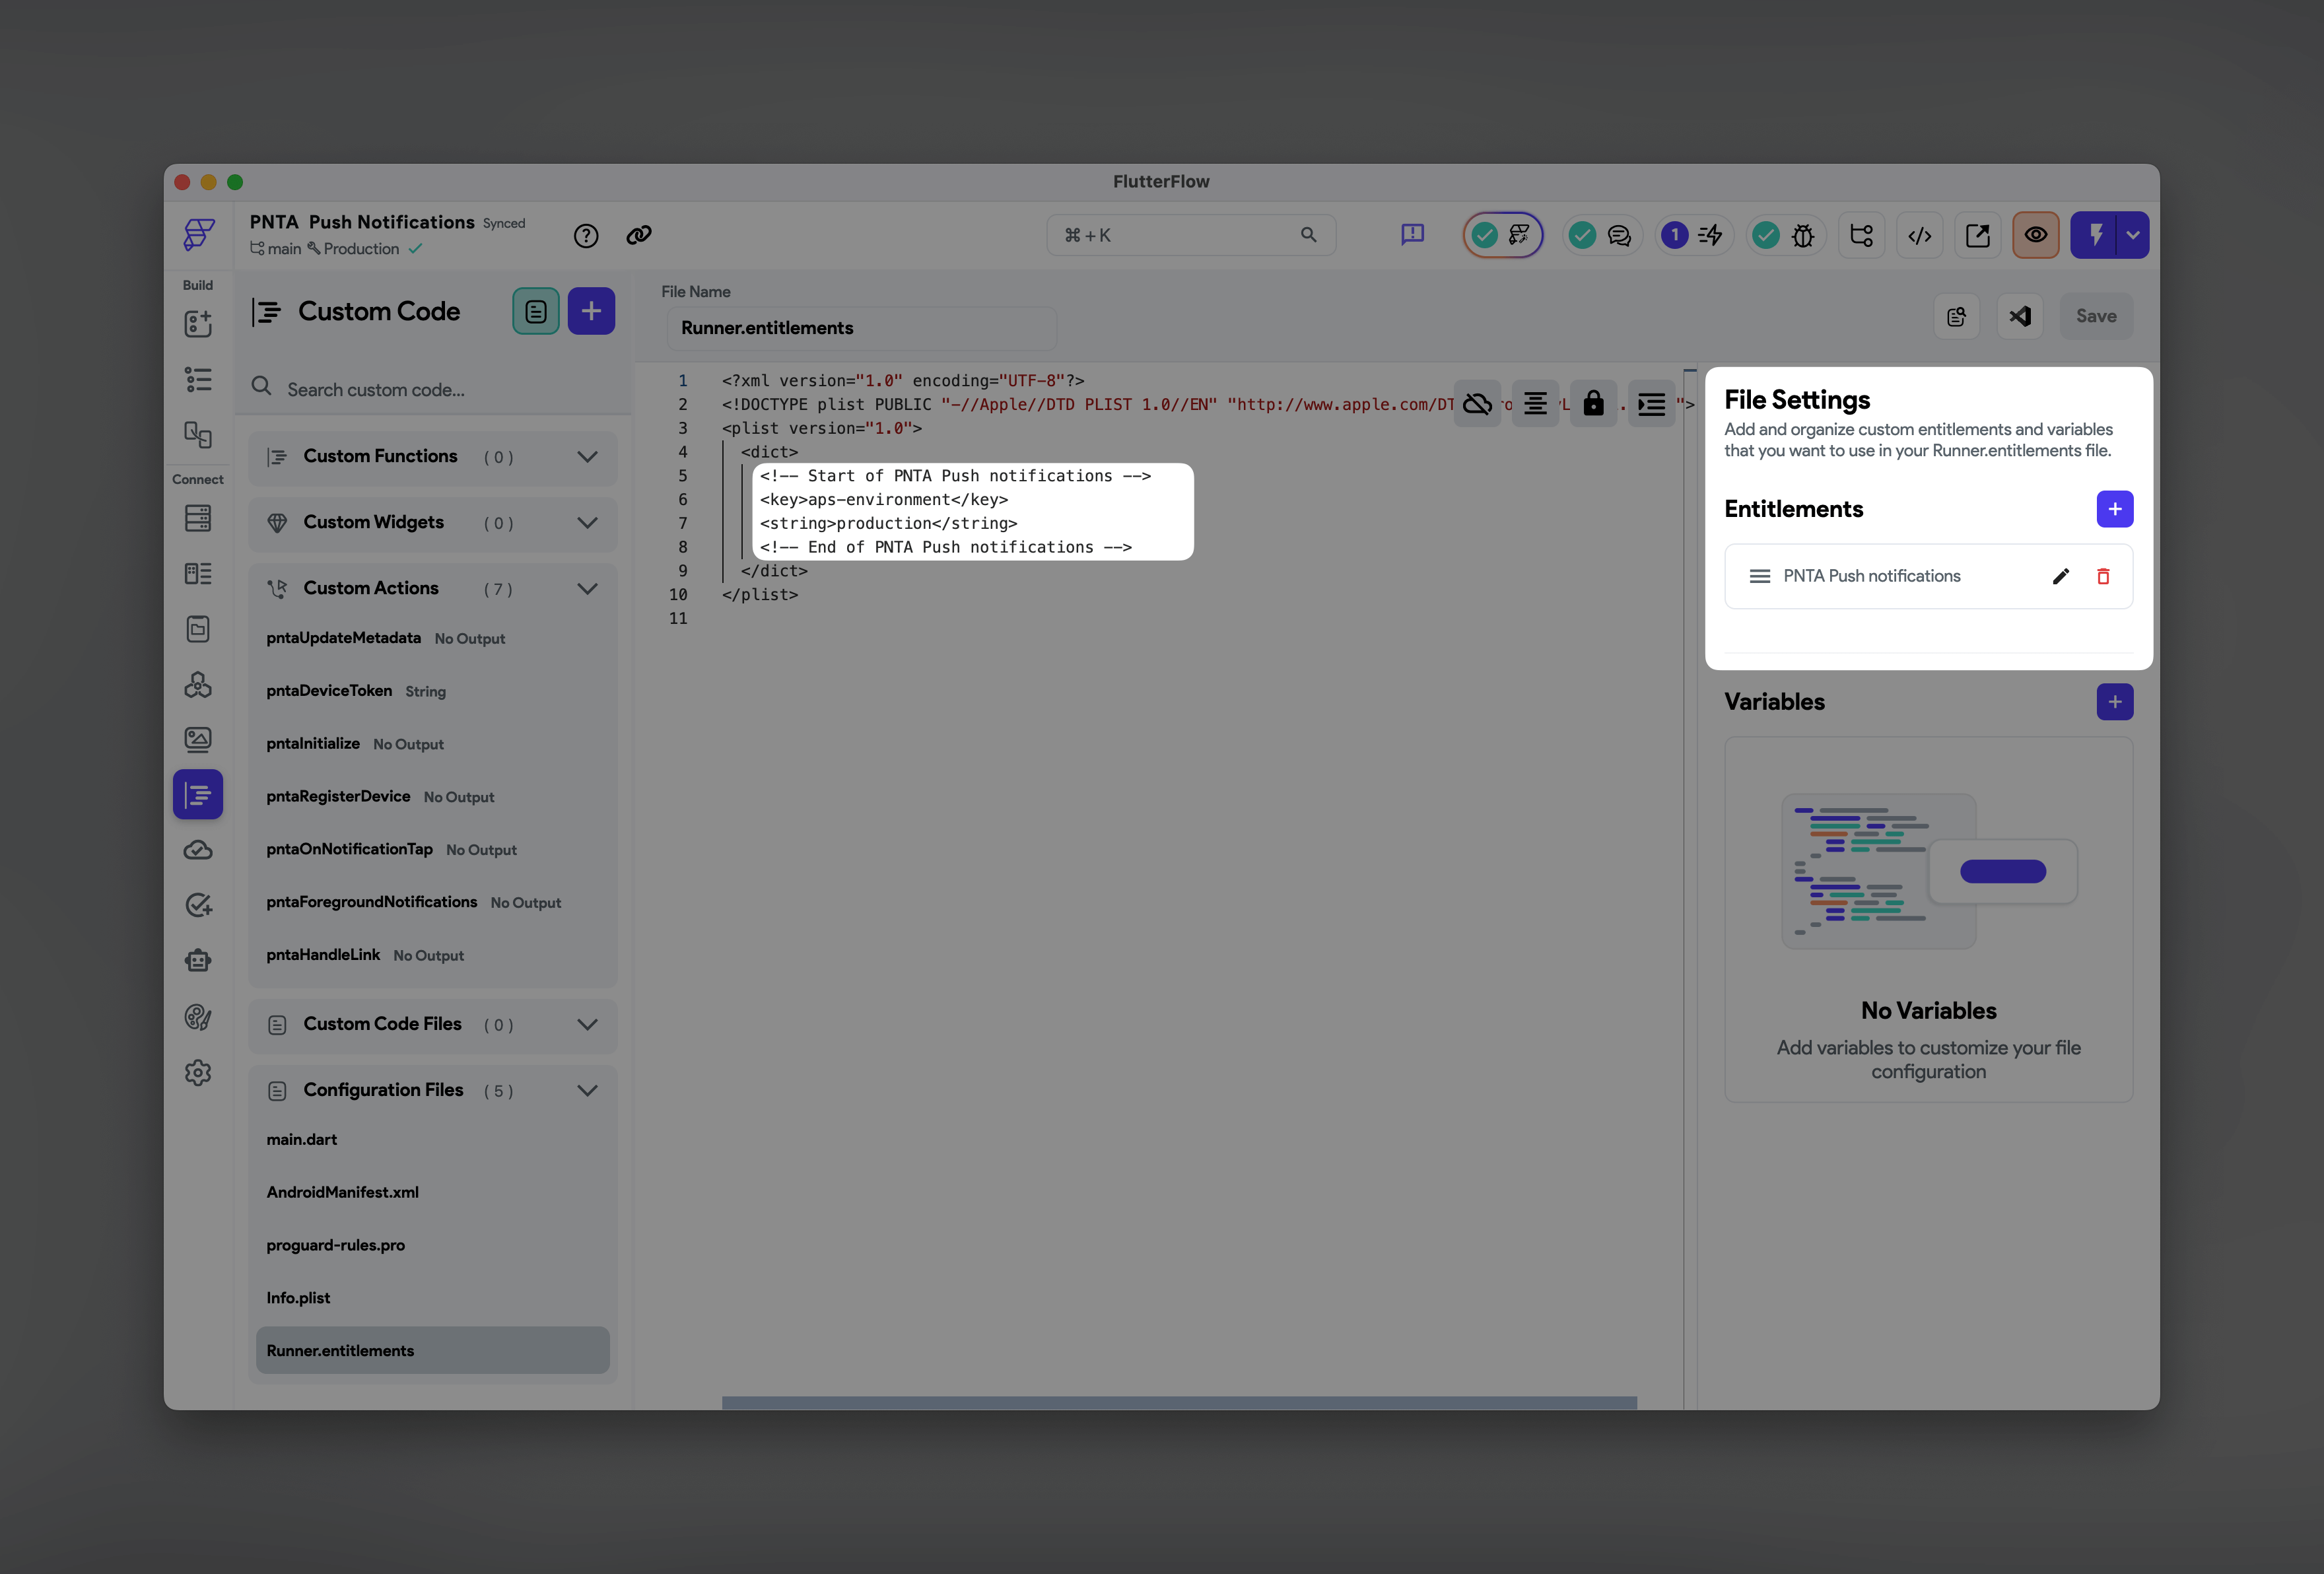
Go to Custom Code → Configuration Files and edit these files to add capabilities normally enabled in Xcode: Properties →Info.plist:
Runner.entitlements:
4. Custom Actions
Create custom actions in Custom Code → Actions for PNTA integration. Copy the required custom actions from our FlutterFlow example project into your project.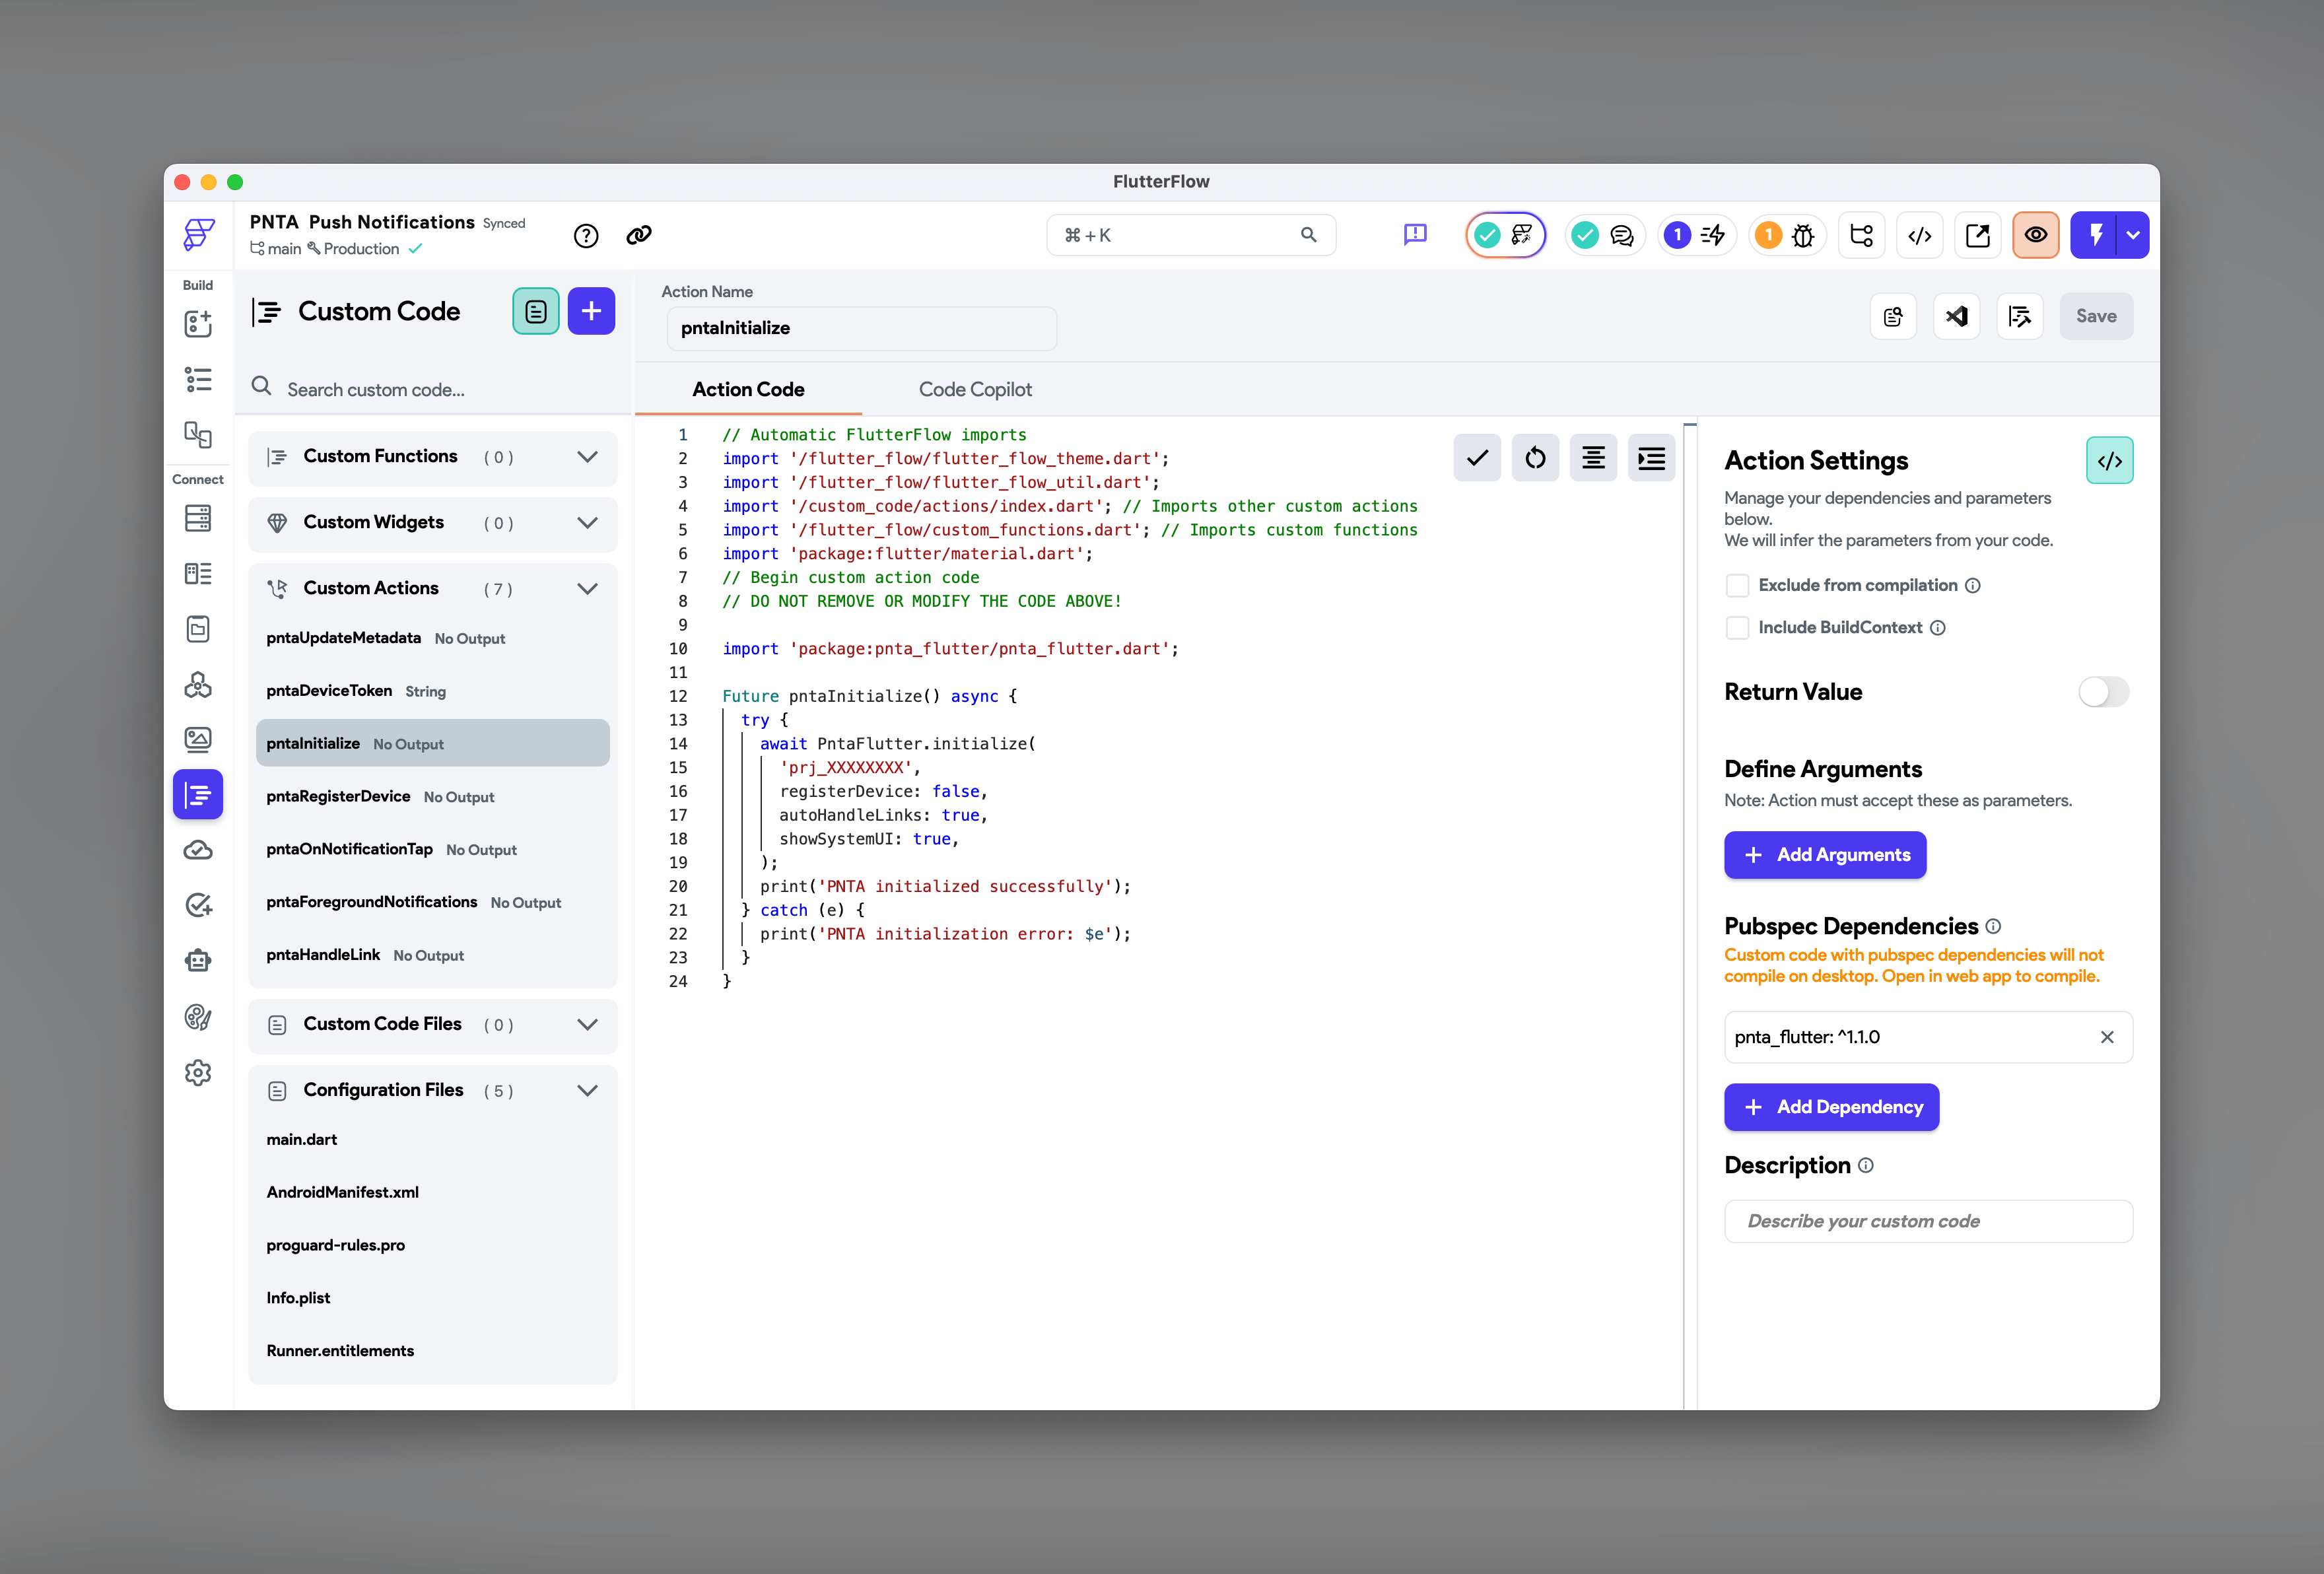
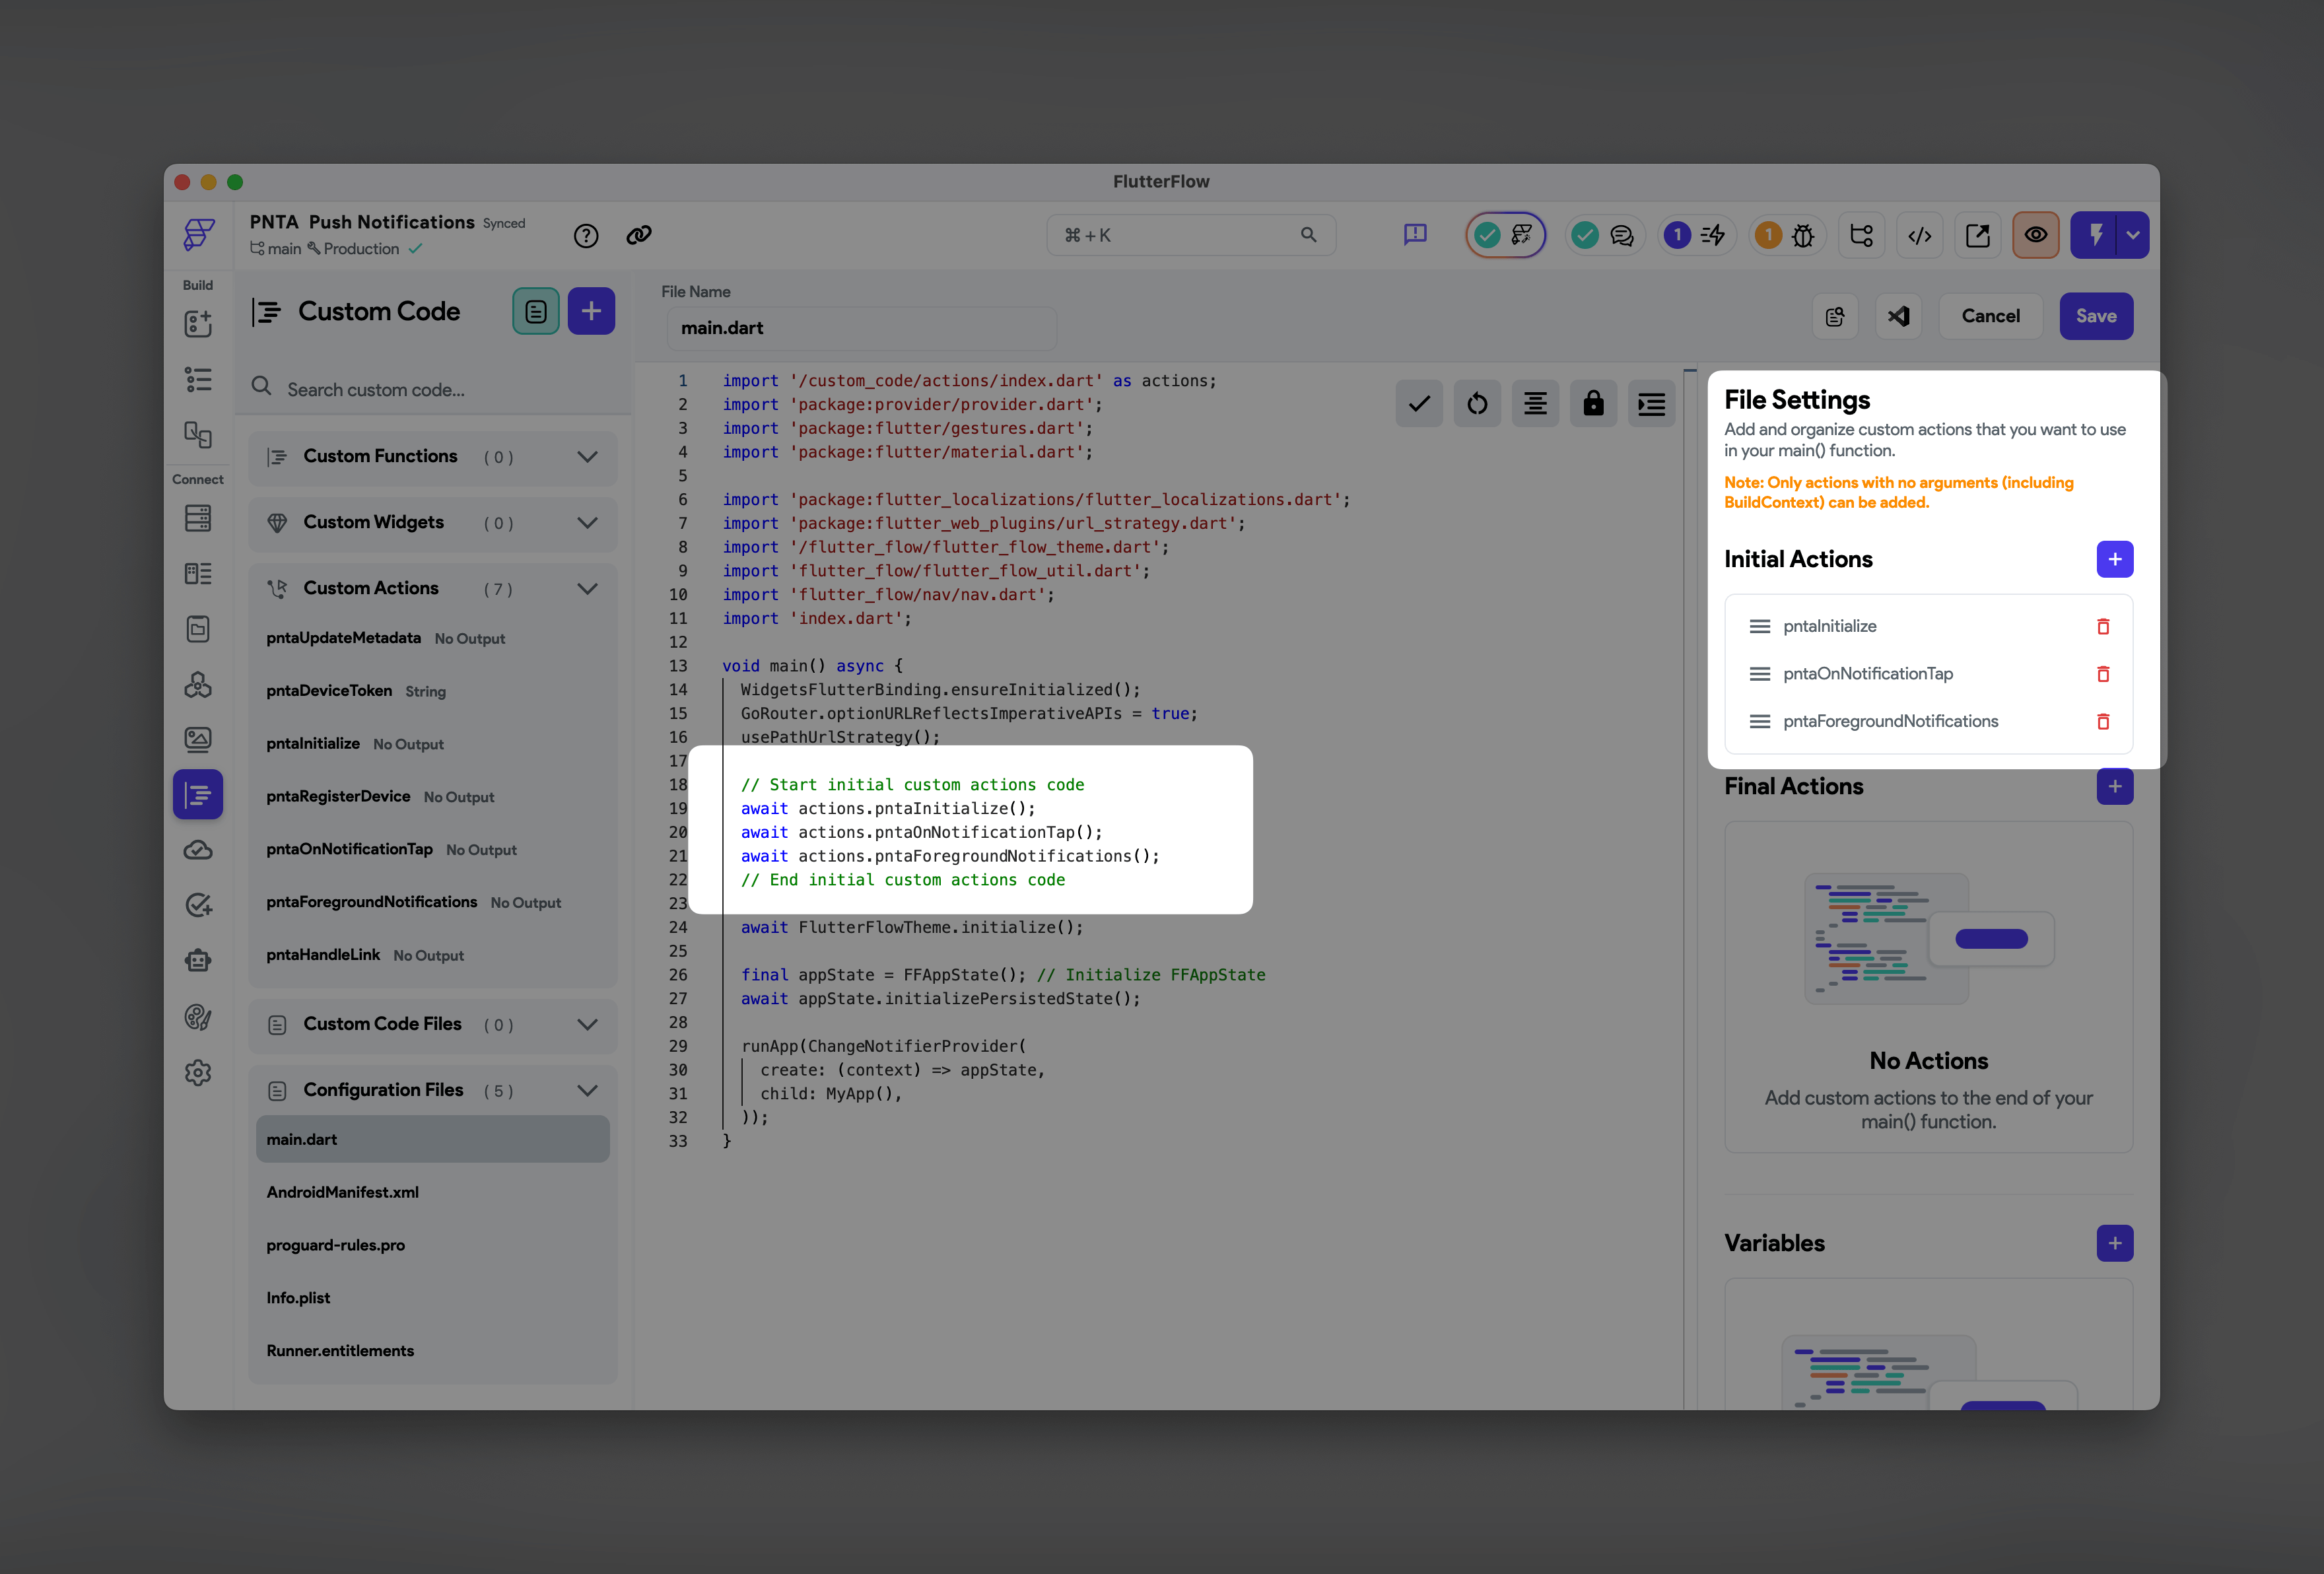
5. Wire Up Your App
Add these custom actions to your app’s Initial Actions in FlutterFlow. Required:pntaInitializeInitialize PNTA with your project ID and optional settings (defaults do not need to be declared):
projectId- your PNTA project ID (required)registerDevice- set false if you want to use prompt registration in a specific flow in your app (default: true)autoHandleLinks- true to automatically open URLs, requires pntaOnNotificationTap to be set up (default: false)showSystemUI- true to show iOS notification banners and Android notification tray/sounds in the foreground (default: false)
pntaOnNotificationTapHandle when users tap notifications from background or closed app. Required if using automatic link handling.
pntaForegroundNotificationsListen for notifications when your app is active. Sends notification data to FlutterFlow app state for custom in-app messages.
6. Additional Methods
These methods can be used anywhere in your app on specific pages:pntaRegisterDeviceUse for delayed registration anywhere in the UI.
pntaDeviceTokenDevice token getter if you want to store it.
pntaUpdateMetadataUpdate device metadata in PNTA.
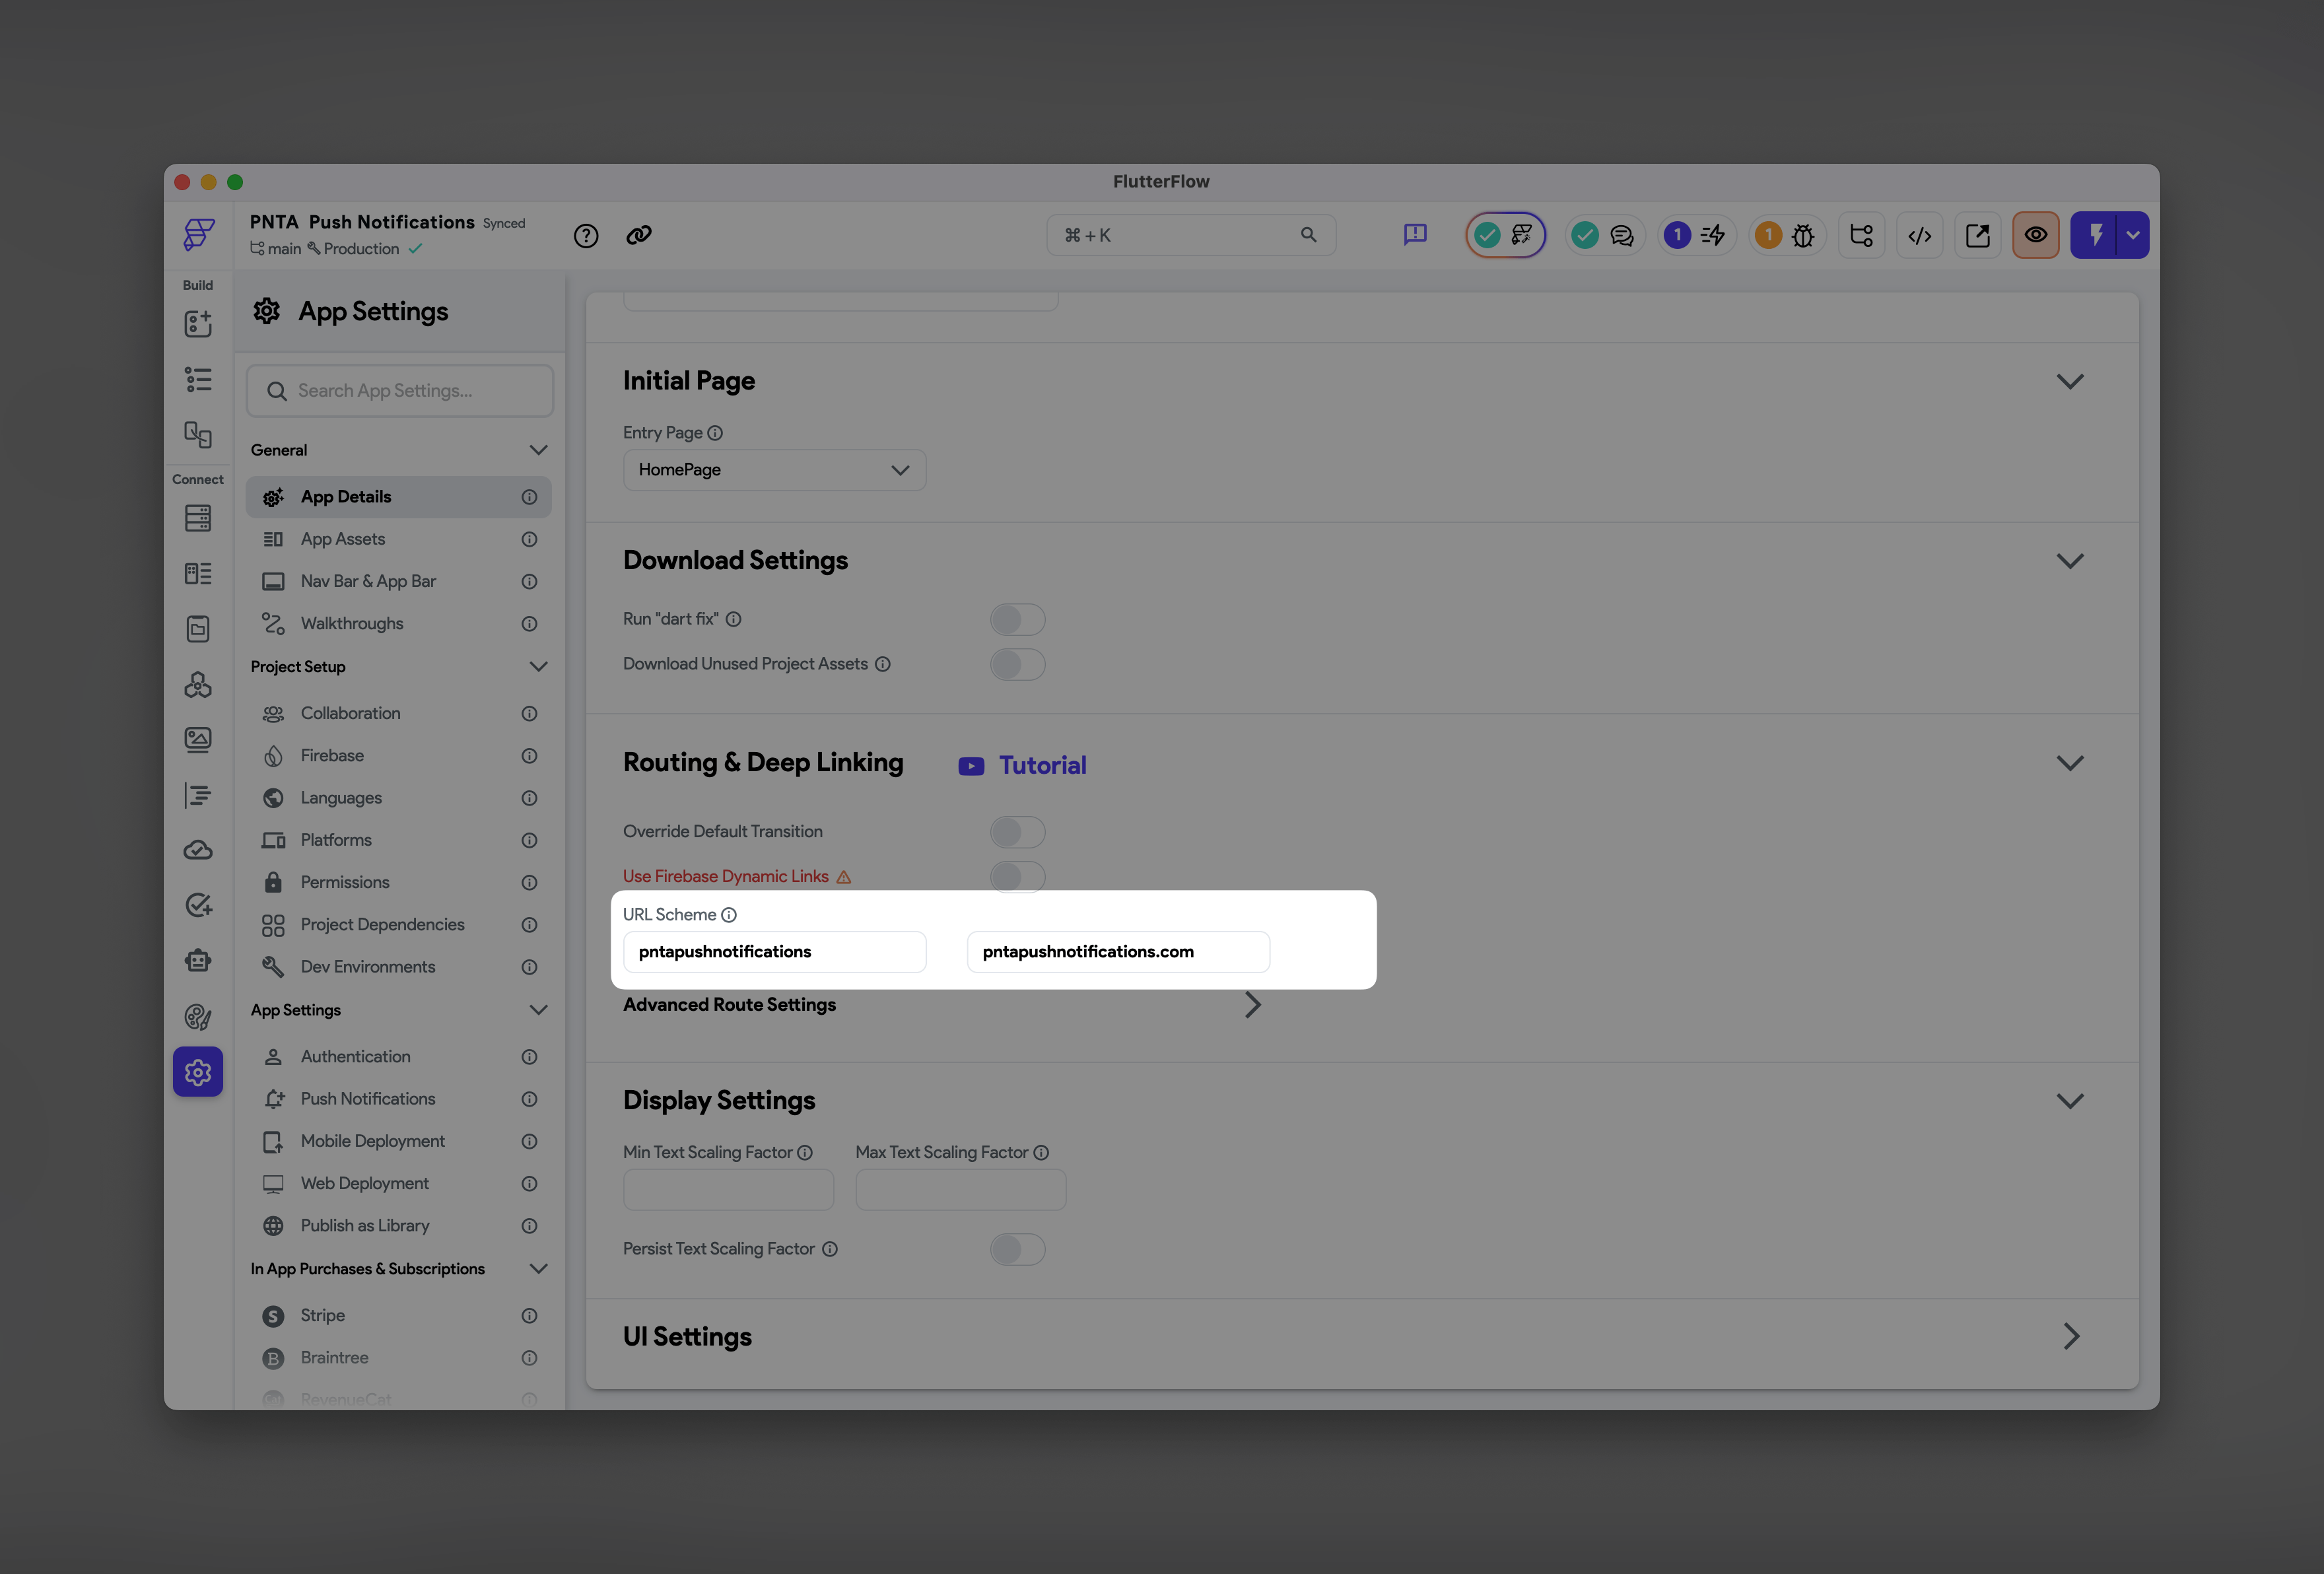
pntaHandleLinkOpens link passed in the notification payload. You can also use FlutterFlow’s default “Launch URL” action which does pretty much the same. For routing within your app using notifications, use the URL scheme provided in Settings → App Details (e.g.,
myapp://myapp.com/profile).
Check out the example project for these additional custom actions and see
how they’re implemented in FlutterFlow’s action builder. Test different
initialize settings to find what works best for your app’s user experience.
Resources
PNTA Flutter Package
View package details and documentation on pub.dev
FlutterFlow Example Project
Complete FlutterFlow project with PNTA integration